Steel is strong, but it has one persistent enemy: rust. Left unprotected, even solid steel corrodes quickly when exposed to moisture, salt, and air. Galvanizing — applying a zinc-based coating that shields the metal from oxidation — is one of the most effective long-term solutions available. The good news is that you don’t need an industrial facility to protect your steel. Knowing how to galvanize steel at home using cold galvanizing compounds, zinc-rich sprays, and brush-on coatings puts effective rust protection within reach for any DIYer.
These home methods won’t replicate a commercial hot-dip galvanizing bath, but they deliver genuine protection for gates, fencing, brackets, tools, trailers, and repair welds. This guide walks you through every step safely and clearly — from surface preparation through final curing — so you can protect your steel with confidence and without putting yourself at risk.
Why Galvanize Steel At Home Matters
Rust doesn’t just look bad — it weakens steel structurally over time, turning a solid component into something unreliable or unusable. Professional hot-dip galvanizing offers excellent protection, but it requires shipping parts to a specialist, costs money, and isn’t practical for small repairs or single components.
Home cold galvanizing fills that gap. Zinc-rich coatings work through the same basic principle as industrial galvanizing: zinc acts as a sacrificial barrier that corrodes before the steel underneath does. For outdoor furniture, farm equipment, weld repairs, railings, and metal fabrication projects, a correctly applied cold galvanizing product significantly extends the service life of the steel.
Step-By-Step Guide To How To Galvanize Steel At Home
Step 1: Gather Your Materials And Set Up A Safe Work Area
Before applying anything to the steel, gather everything you’ll need: a wire brush or angle grinder with a wire wheel, sandpaper in 80 and 120 grit, a metal degreaser or acetone, clean rags, your chosen cold galvanizing product (spray, brush-on compound, or zinc-rich primer), protective gloves, safety glasses, and a respirator rated for chemical vapors.
Work in a well-ventilated space — outdoors is ideal. Zinc-based coatings release fumes during application and curing, and enclosed spaces concentrate those fumes quickly. Set your steel piece on a stable work surface where you can access all sides. Lay down drop cloth or cardboard to protect the ground and make cleanup easier when you’re done.
Step 2: Remove All Rust, Scale, And Old Coatings
Cold galvanizing compounds bond directly to bare metal, not to rust, paint, or contamination. Any existing rust, mill scale, or old coating left on the surface will prevent adhesion and cause the zinc layer to fail prematurely. Start with a wire brush to knock off loose rust and flaking material, then use an angle grinder with a wire wheel or flap disc for more thorough preparation.
Follow up with 80-grit sandpaper to address remaining surface rust, then move to 120-grit to smooth the profile. The goal is clean, dull metal — not polished, but free of loose particles, corrosion, and previous coatings. Pay close attention to corners, edges, and weld seams where rust tends to concentrate. Good preparation at this stage is the single biggest factor in how well the final coating performs.
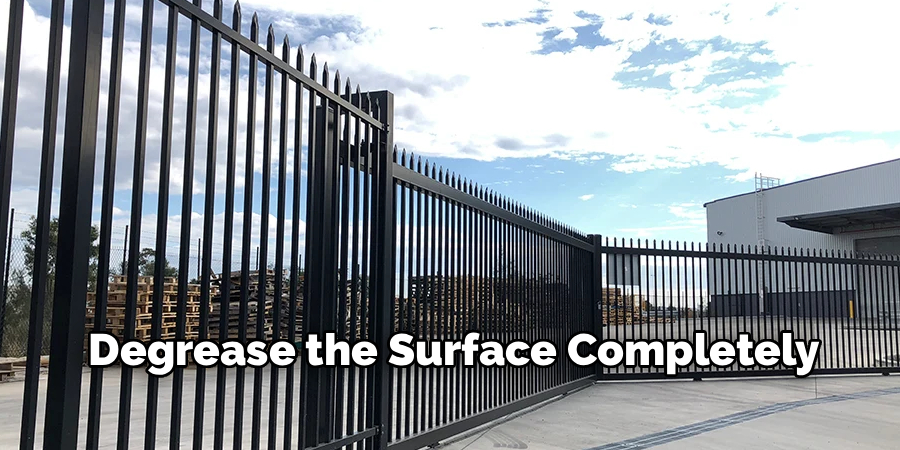
Step 3: Degrease The Surface Completely
Even after mechanical preparation, skin oils, cutting fluids, grinding residue, and surface contaminants remain on the steel. These invisible films prevent zinc coatings from bonding correctly and create adhesion failures that show up as peeling or bubbling within weeks. Degreasing is non-negotiable.
Wipe down the entire surface with a clean rag soaked in acetone or a dedicated metal degreaser. Use straight, overlapping strokes and flip to a clean section of the rag frequently — dragging the same rag back across the surface redistributes contamination rather than removing it. Allow the solvent to flash off completely before touching the surface again. Once degreased, avoid touching the steel with bare hands. Even clean skin leaves oil that disrupts adhesion.
Step 4: Choose The Right Cold Galvanizing Product For Your Application
Cold galvanizing products come in three main forms: aerosol sprays, brush-on liquid compounds, and zinc-rich primers. Each suits different situations. Aerosol sprays are fast and convenient for small repairs, touch-ups on weld seams, or areas that are hard to reach with a brush. Brush-on compounds offer more control and higher zinc content, which improves protection on larger surfaces. Zinc-rich primers work well as a base coat before applying a topcoat of paint for both protection and appearance.
Check the zinc content listed on the product label — higher percentages (90% or above dry zinc content) provide better galvanic protection. Products marketed as “cold galvanizing compound” from brands like Rust-Oleum, ZRC, or Galvacon are formulated specifically for this purpose. Read the technical data sheet for each product to confirm it suits your exposure environment — indoor, outdoor, marine, or agricultural use each have appropriate product recommendations.
Step 5: Apply The First Coat In Thin, Even Layers
How To Galvanize Steel At Home effectively depends heavily on application technique. Thin coats bond better, cure more evenly, and build up to a stronger total film than thick single applications. For spray products, hold the can 10 to 12 inches from the surface and apply in smooth, overlapping passes. For brush-on compounds, use a natural-bristle brush and work the product in one direction without overworking it.
Apply just enough product to achieve uniform coverage — the surface should look consistently coated without runs, drips, or pooling at edges. If any drips occur, spread them out immediately before they begin to set. A thin first coat typically dries to the touch within 15 to 30 minutes depending on temperature and humidity. Applying a second coat too soon traps solvent underneath and causes adhesion problems, so allow the first coat to dry fully before assessing coverage.
Step 6: Apply Additional Coats And Allow Proper Cure Time
One coat is rarely sufficient for lasting protection in outdoor or exposed environments. Once the first coat is fully dry to the touch, apply a second coat using the same thin, even technique. For parts exposed to significant moisture, UV light, or abrasion, a third coat may be appropriate — check your product’s data sheet for maximum recommended coats.
Full cure time differs from dry-to-touch time. Most cold galvanizing products reach handling strength within a few hours but continue curing for 24 to 72 hours before reaching full hardness and chemical resistance. Avoid exposing freshly coated parts to water, flexing, or mechanical contact during this window. Curing in warm, dry conditions speeds the process; cold or humid conditions slow it. Patience at this stage protects everything you’ve already invested in surface prep and application.
Step 7: Inspect The Finished Coating And Know Its Limits
Once fully cured, inspect the coating in good lighting. Look for thin spots, missed edges, pinholes, or areas where adhesion appears inconsistent. Touch up any gaps with a small brush before putting the part into service — small bare spots are where corrosion starts. Run your finger across the surface gently; a properly cured cold galvanizing coating feels firm and slightly matte.
Understand where this approach is appropriate and where it isn’t. Cold galvanizing provides excellent protection for moderate outdoor exposure, weld repairs, cut edges, and maintenance applications. It is not a substitute for professional hot-dip galvanizing on structural steel, fasteners under heavy load, or components submerged in water long-term. For those applications, consult a professional galvanizing service. Knowing the limits of your coating is part of doing the job correctly.
Frequently Asked Questions
Is Cold Galvanizing As Effective As Hot-Dip Galvanizing?
Cold galvanizing provides meaningful rust protection but does not match the durability of industrial hot-dip galvanizing. Hot-dip creates a metallurgical bond with the steel and a thicker zinc layer. Cold galvanizing is better suited for repairs, touch-ups, and moderate outdoor exposure rather than structural or high-immersion applications where industrial processing is the appropriate choice.
Do I Need A Respirator When Applying Zinc Coatings?
Yes, a respirator is strongly recommended. Zinc-based coatings release solvent and zinc-compound vapors during application and initial curing. A respirator rated for organic vapors provides adequate protection for most products. Always work in a well-ventilated area regardless. Read the safety data sheet for your specific product to confirm the appropriate personal protective equipment required.
Can I Paint Over A Cold Galvanized Surface?
Yes, most cold galvanizing compounds accept topcoats once fully cured. Some products may need a tie-coat or epoxy primer between the zinc layer and the finish paint to ensure proper adhesion. Check the manufacturer’s guidelines for your specific product before applying a topcoat. Applying paint too soon over uncured zinc can cause adhesion failure and peeling.
How Long Does A Cold Galvanized Coating Last Outdoors?
Longevity depends on zinc content, coating thickness, surface preparation quality, and exposure conditions. A properly prepared and applied high-zinc coating can provide several years of rust protection in moderate outdoor environments. Harsh coastal, industrial, or high-moisture environments reduce coating life. Regular inspection and touch-up of worn areas extends overall service life significantly.
Can I Use Cold Galvanizing On Weld Repairs?
Yes, cold galvanizing compounds are particularly well-suited for weld repairs because welding burns off the protective coating in and around the weld zone. Once the weld has cooled and the area has been cleaned of spatter and scale, applying a zinc-rich compound restores protection to the exposed steel. This is one of the most practical and common uses for home galvanizing products.
Conclusion
Protecting steel from rust doesn’t require a factory or specialist equipment. With the right cold galvanizing product, proper surface preparation, and careful application, you can extend the life of steel components significantly without leaving your garage or workshop.
The steps that matter most are the ones before you open the product: removing rust thoroughly, degreasing completely, and choosing a product suited to your specific conditions. Application technique and adequate cure time do the rest. Understanding how to galvanize steel at home through safe, accessible cold galvanizing methods gives you a practical skill that pays off every time you build, repair, or restore metal. Take your time with each stage, respect the ventilation and safety requirements, and the results will be durable and worth the effort.

About
Stuart Rich is a distinguished figure in the world of metalworking and fabrication, with a decade of expertise creating innovative and sustainable metal projects. His professional focus lies in merging traditional blacksmithing and machining with modern manufacturing techniques, fostering designs that are both practical and durable. As the author of Metalenify, Stuart Rich delves into the art and science of metallurgy and DIY metal creation, inspiring artisans, hobbyists, and industry professionals alike.
Education
RMIT University
(Melbourne, Australia)
Associate Degree in Engineering Technology (Mechanical / Manufacturing)
Focus on metallurgical properties, industry-driven projects, and practical metal craftsmanship. Gained hands-on experience with traditional machining and digital manufacturing tools, such as CAD, CNC software, and precision welding equipment.
Nottingham Trent University
(United Kingdom)
Bachelor’s in Product Design and Materials Engineering (Honors)
Specialized in product design with a heavy focus on blending creativity with metal production and fabrication techniques. Participated in real-world industry projects, collaborating with architectural and hardware manufacturing companies to optimize material efficiency.
Publications and Impact
In Metalenify, Stuart Rich shares his insights on structural metal design processes, material grades, and strategies for efficient shop production. His writing bridges the gap between raw artisan knowledge and modern industrial needs, making it a must-read for both budding DIY metalworkers and seasoned fabrication professionals.