That tired metal file cabinet shoved into the corner of your office? It doesn’t have to stay an eyesore. Give it some time and the right method, and you can land a finish that actually looks like it belongs in your space. No spray paint required—not a single can.
Brushing the paint on by hand has a few quiet advantages. It’s cleaner. You get more control, which matters a lot when you’re working indoors and don’t want a fine mist settling over everything you own. The finish tends to hold up well, too, surviving the daily abuse of drawers being yanked open and slammed shut. What follows is the rundown: the tools, the steps, and a handful of tips that should leave you with a cabinet you might actually want people to see. In this guide on how to paint a metal file cabinet without spray paint, we will cover the materials needed, the steps involved, and some tips to ensure a successful project.
Tools and Materials You’ll Need
Pull everything together before you start. There’s nothing worse than realizing you’re out of sandpaper with a half-primed cabinet drying in front of you. Here’s the list:
- Rust-inhibiting metal primer (oil-based or water-based)
- Paint made for metal (enamel tends to work best)
- Sandpaper (120-grit and 220-grit)
- Tack cloth or microfiber rags
- Painter’s tape
- A good angled brush and a small foam roller
- Mild dish soap and water
- Drop cloth or some old newspaper
- A screwdriver for pulling off handles and hardware
- Rubber gloves and a mask
One thing worth saying here: cheap brushes leave streaks and shed bristles into your wet paint. Spend a little more on decent tools. You’ll notice the difference when you’re done.
7 Simple Step-By-Step Guidelines on How to Paint a Metal File Cabinet Without Spray Paint
Work through these in order. And please—don’t speed through the prep. The smoothness of your final coat depends almost entirely on what you do before any paint touches the metal.
Step 1: Empty and Disassemble the Cabinet
Take out every drawer and empty it completely. The cabinet gets lighter and a whole lot easier to handle this way. Grab your screwdriver and remove the handles, knobs, and any label holders. Drop the hardware into a small container, so you’re not hunting for screws later.
Pulling the drawers also means you can paint the front edges without them gluing themselves shut as they dry—a frustrating thing to discover after the fact. If your cabinet sits on rubber feet or sliders, leave those alone; they’re protecting your floor. A fully stripped-down cabinet gives you a clear shot at every surface, which is what you want for an even coat.
Step 2: Clean Every Surface Thoroughly
Years of grease, dust, and fingerprints build up on metal cabinets, and paint simply won’t stick to that. Mix a bit of mild dish soap into warm water and wipe the whole thing down. Pay extra attention to the handles and the spots people touch most.
Stubborn, oily grime might need a degreaser to break it loose. Once the cabinet is clean, go over it again with a damp cloth to lift off any leftover soap. Then let it dry completely. This part matters more than it seems—trapped moisture can wreck your primer before you’ve even started. A clean surface is the whole foundation here, so resist the urge to rush it.
Step 3: Sand the Surface
Sanding gives the paint something to bite into. Start with 120-grit to scuff up the old finish and knock back any rust or rough patches. You’re not stripping the thing down to bare metal—just dulling the shine so the primer has a fighting chance to bond.
After that first pass, move to 220-grit for a smoother feel. Sand in steady, even strokes and don’t skip any sections. Find rust? Keep at it until you hit clean metal underneath. When you’re done, wipe everything down with a tack cloth. Dust left on the surface will show up later as little bumps under your primer, which is exactly what you’re trying to avoid.
Step 4: Apply Primer
Here’s the step people love to skip—and it’s almost always a mistake. A rust-inhibiting metal primer blocks corrosion down the line and helps your paint hang on far better. Use the angled brush for corners and edges, then switch to the foam roller for the big flat panels.
Keep the coat thin and even. An overloaded brush drips, and drips are a pain to fix once they’ve set. Let the primer dry as long as the can tells you to, usually a few hours. If the original color was dark or you can still spot patches bleeding through, go ahead and add a second coat. This single step is often what separates a finish that lasts years from one that starts peeling in a couple of months.
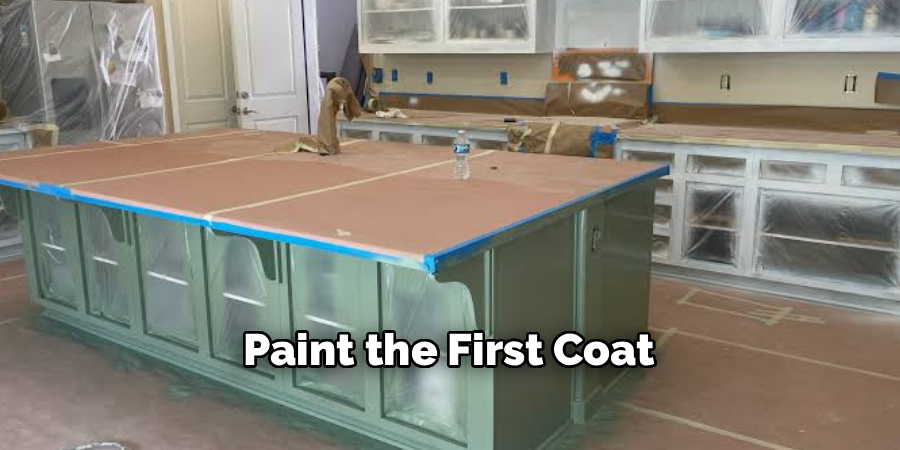
Step 5: Paint the First Coat
Now the satisfying part. Stir your paint well before you start, since the pigment settles to the bottom while it sits. With the angled brush, hit the edges, corners, and any fiddly detailed areas first. Then bring out the foam roller for the wide-open surfaces.
Thin coats are your friend. Trying to cover everything in one heavy pass leads to drips, runs, and a drying time that drags on forever. Keep a “wet edge” by slightly overlapping each stroke—that’s how you avoid visible lap lines later. If the first coat looks streaky and patchy, don’t panic. That’s normal. The next coat pulls it all together.
Step 6: Apply a Second Coat
Once the first coat has dried fully, give it a light sanding with 220-grit to smooth out any little imperfections, then clear the dust with a tack cloth. It feels like an extra chore, but it makes a real difference in how the final surface feels under your hand.
Lay down the second coat the same way—edges first, then the flat panels. This one should look noticeably more even and richer in color. Keep an eye out for drips as you go. If the color still seems a touch thin, a third coat won’t do any harm. The patience you spend here is what gives you that deep, professional-looking finish that hides the cabinet’s former life.
Step 7: Reassemble and Cure
Let the paint dry all the way before you touch a thing. Rush this and you’ll leave fingerprints pressed into the surface. The cabinet may feel dry within hours, but enamel needs real time to harden and cure properly—often several days, not several hours.
When the paint is dry to the touch, reattach the handles and hardware you stashed away. Slide the drawers back in slowly so you don’t scrape the fresh paint along the edges. Load your files, then step back and take it in. Try to keep heavy objects off the top for the first week or so, just to let everything cure undisturbed. After that, your refreshed cabinet is ready to go back to work.
Following these steps on how to paint a metal file cabinet without spray paint can help you achieve a professional and long-lasting finish.
Common Mistakes to Avoid
Even a straightforward project can fall apart if you cut the wrong corner. Skipping the cleaning or sanding is the most frequent slip-up, and it nearly always ends in peeling paint. Don’t rush the drying time between coats; wet paint smears at the lightest touch. Piling on thick coats to finish faster tends to backfire with drips and a lumpy texture.
And the primer—never skip the primer. Painting bare metal without it is more or less inviting chips and rust to show up later.
Do You Need To Use Professionals?
For most metal file cabinets, no. This is a beginner-friendly job that asks for patience more than any real skill, and the tools are cheap and easy to track down. If you can follow a set of steps and carve out a weekend, you can manage this on your own.
There are exceptions, though. If you’ve got a whole row of cabinets to tackle, you’re after a flawless factory-grade finish, or you’re staring down serious rust damage, a professional may save you a fair bit of frustration. But for one cabinet at home or in a modest office, the DIY route is genuinely satisfying—and a lot lighter on your wallet.
How Much Will It Cost?
Doing this yourself is easier on the budget than you might guess. Plan on spending somewhere around $30 to $70 on supplies, depending on how nice your paint and primer are. A quart of metal enamel usually runs $15 to $30, with primer landing around $10 to $20. Brushes, rollers, sandpaper, and tape might add another $15 to $25 if your toolbox is bare.
Set that against hiring someone, which can run $100 to $300 or more per cabinet, and the math speaks for itself. Plenty of these supplies stick around for future projects, too, so the real cost per cabinet keeps dropping over time.
Frequently Asked Questions
Do I Really Need To Sand a Metal Cabinet Before Painting?
Yes, and it may be the single most important step of the whole job. Sanding scuffs up that smooth, glossy surface so the primer and paint can actually grip it. Skip it, and peeling or chipping is the likely result. You don’t have to go all the way to bare metal—just dull the shine with 120-grit, then smooth things out with 220-grit. A few minutes of effort here could be the difference between a finish that holds for years and one that gives up within months.
What Kind of Paint Works Best on Metal File Cabinets?
Enamel paint made for metal is your safest bet. It dries hard and stands up to scratches, chips, and everyday wear far better than ordinary wall paint. You can go oil-based or water-based—water-based cleans up easily and smells less, while oil-based tends to be tougher overall. Whichever you pick, pair it with a rust-inhibiting metal primer for the best grip and the longest life. That combination is what gives you a smooth result that doesn’t fall apart in a season.
How Long Should I Wait Between Coats of Paint?
It depends on the paint and the room you’re working in, but waiting four to six hours between coats is a reasonable rule. Always check the can first, since some formulas want longer. Temperature and humidity play a part too—cool, damp conditions can stretch drying time well past what the label suggests. The temptation to rush is real, but a fresh coat of paint that isn’t quite dry will smear everything and leave you starting over.
Bring New Life to Your Old Cabinet
Painting a metal file cabinet without spray paint might be one of the most satisfying low-effort upgrades you can give a workspace. A little prep, the right materials, and some patience between coats, and that tired old box becomes something functional you’ll actually be glad to look at for years.
The takeaways are simple enough to hold in your head: clean it well, sand it for grip, never skip the primer, and keep your coats thin and even. Stick to those and you’ll walk away with a smooth, durable finish that rivals a professional job at a sliver of the price. Round up your supplies, block out a weekend, and give that cabinet the second life it’s owed. Thanks for reading this guide on how to paint a metal file cabinet without spray paint.

About
Stuart Rich is a distinguished figure in the world of metalworking and fabrication, with a decade of expertise creating innovative and sustainable metal projects. His professional focus lies in merging traditional blacksmithing and machining with modern manufacturing techniques, fostering designs that are both practical and durable. As the author of Metalenify, Stuart Rich delves into the art and science of metallurgy and DIY metal creation, inspiring artisans, hobbyists, and industry professionals alike.
Education
RMIT University
(Melbourne, Australia)
Associate Degree in Engineering Technology (Mechanical / Manufacturing)
Focus on metallurgical properties, industry-driven projects, and practical metal craftsmanship. Gained hands-on experience with traditional machining and digital manufacturing tools, such as CAD, CNC software, and precision welding equipment.
Nottingham Trent University
(United Kingdom)
Bachelor’s in Product Design and Materials Engineering (Honors)
Specialized in product design with a heavy focus on blending creativity with metal production and fabrication techniques. Participated in real-world industry projects, collaborating with architectural and hardware manufacturing companies to optimize material efficiency.
Publications and Impact
In Metalenify, Stuart Rich shares his insights on structural metal design processes, material grades, and strategies for efficient shop production. His writing bridges the gap between raw artisan knowledge and modern industrial needs, making it a must-read for both budding DIY metalworkers and seasoned fabrication professionals.