You’re holding a copper piece, and it just feels too light. Maybe it’s a pendant that should hang with some presence, or a handle that wants a little more authority in the hand. Something’s missing, and that something is weight.
Here’s the reassuring part. Learning how to make copper heavier isn’t a dark art. It comes down to a few proven approaches, each suited to a different goal.
You can electroplate fresh copper onto the surface, building thickness layer by layer. You can alloy it with denser metals during melting. Or you can simply add mass by filling and layering.
Match the method to what you actually need, and gaining weight without ruining the look is genuinely doable.
This guide covers the whole arc. The reasons, the methods, the tools, the safety prep, a full step-by-step plating walkthrough, and the mistakes that waste good material.
Bring a little patience, and heavier copper sits well within reach.
Why Make Copper Heavier?
Before reaching for chemicals or a torch, it’s worth asking what the extra weight buys you. The answer depends a lot on what you’re making.
Better Balance and Feel
Weight changes how an object reads in the hand. A heavier pendant or ring carries a more substantial, premium feel, the kind people associate with quality rather than a cheap stamping.
The same goes for functional pieces. A tool handle or a decorative base with a bit more heft sits steadier and balances better.
It’s a subtle thing, that sense of solidity. But it tends to be the difference between something that feels disposable and something that feels made.
Function, Conductivity, and Durability
Beyond feel, added copper does real work. Thicker copper carries more current, which matters in electrical applications where a heavier conductor handles a heavier load.
It also wears better. More material means more to grind down, corrode, or fatigue before the piece fails.
So for plumbing fittings, electrical components, and anything that takes daily abuse, the extra mass isn’t vanity. It may suggest a longer, more dependable service life.
Understanding What “Heavier” Really Means
Here’s where people often go wrong from the start. “Heavier” can mean two quite different things, and confusing them leads to picking the wrong method entirely.
Adding Mass vs. Increasing Density
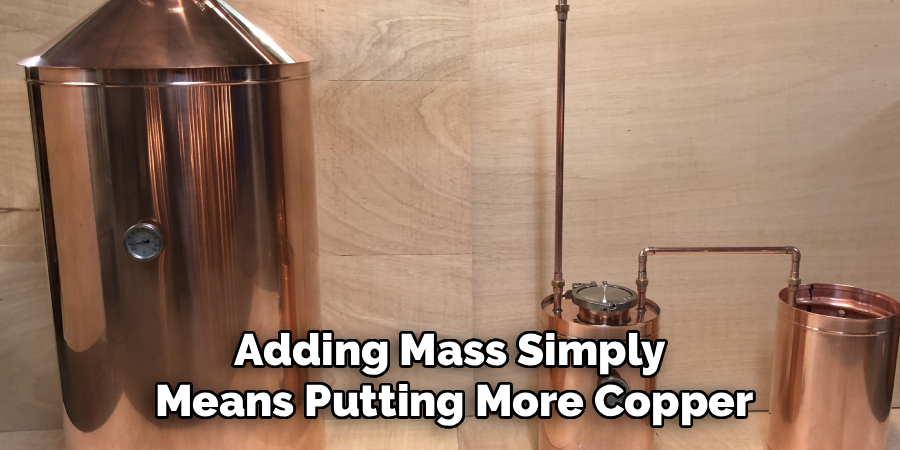
Adding mass simply means putting more copper, or more material, onto or into the piece. The object grows a little, and the scale climbs accordingly. Electroplating and filling both work this way.
Increasing density is a different beast. Here, you change what the metal is made of, alloying copper with a heavier element so the same volume weighs more.
The distinction matters because the processes barely resemble each other. One adds copper to an existing shape; the other melts and reformulates it. Knowing which outcome you’re after saves you from a frustrating detour.
Setting a Realistic Weight Goal
So decide early how much weight you actually need. A few grams for better balance? Or a dramatic jump in height?
Small gains favor plating, which builds slowly and predictably. Large gains may call for alloying, or honestly, a redesign with thicker stock from the start.
Be honest with yourself here. Chasing a big weight increase through plating alone is a slow road, and you’ll likely lose patience long before the scale cooperates.
Common Methods to Make Copper Heavier
Three approaches cover nearly every situation. Each has its own demands, and matching one to your project before you gather tools saves a lot of wasted effort.
Electroplating Extra Copper
Electroplating uses an electric current to deposit a fresh layer of copper onto an existing surface. Over time, that layer thickens, adding weight while keeping the same color and finish.
It’s the most accessible home method, and it gives you fine control. The catch is speed, since real weight builds gradually rather than all at once.
Alloying With Denser Metals
Alloying means melting copper down and blending it with a heavier element to raise the overall density. The result can be genuinely weightier per unit of volume.
It also changes the metal’s properties, sometimes its color and workability too. This path demands high heat, a furnace, and careful handling, so it isn’t a casual undertaking.
Adding Internal Mass or Layers
The simplest route skips chemistry altogether. You fill a hollow piece with a heavier core, bond an extra copper sheet to a base, or build up solid backing behind the visible surface.
None of this touches the copper everyone sees. The weight goes where it doesn’t show, which makes it a practical trick for decorative work.
Tools and Materials You’ll Need
Gathering everything first keeps the work moving. There’s little worse than pausing a plating run halfway through to hunt for a clamp.
Essential Tools
For plating, the heart of your setup is a power supply or a dedicated plating rectifier, paired with a tank or container to hold the solution. You’ll also want electrodes, a reliable scale for tracking gains, and clamps to suspend the pieces.
Round it out with basic cleaning and finishing tools, the kind most workshops already keep on hand. Nothing here is exotic, which is part of the plating’s appeal.
A decent scale matters more than people expect. Without it, you’re guessing at your progress, and guessing defeats the whole point of controlled weight.
Materials and Supplies
On the materials side, copper sulfate solution does the chemical heavy lifting, drawn onto your piece from a copper anode. Distilled water keeps the solution clean of mineral interference.
Add a good degreaser and some fine sandpaper for surface prep. And if you’re going the mass-based route instead, keep your backing metal or filler ready.
Safety Preparation Before You Begin
Plating chemicals and molten metal both deserve respect. A little preparation keeps a productive afternoon from turning into a regret.
Handling Chemicals Safely
Copper sulfate isn’t something to handle casually. Wear chemical-resistant gloves, safety glasses, and an apron, and work in a well-ventilated space rather than a closed corner.
Storage and disposal matter too. Keep solutions labeled, sealed, and handled according to your local rules, since pouring spent plating fluid down a drain is rarely acceptable.
A Safe, Organized Workspace
Keep food and drink well away from the work area. It sounds obvious, yet it’s an easy slip when you’re focused on a piece.
Protect your surfaces, label every container clearly, and keep water and a simple spill kit within reach. A small splash handled quickly stays small, while one left to spread becomes a mess.
How to Make Copper Heavier: Step-by-Step Guide
Now to the heart of it. Each step builds on the one before, and this walkthrough focuses on electroplating, the most accessible way to add controlled weight at home.
Step 1: Weigh and Inspect the Piece
Start by recording the piece’s weight on your scale. That number is your baseline, and you’ll come back to it again and again.
While you’re at it, inspect the copper for damage or deep scratches. Note the surface area too, since a larger surface plates differently than a small one and shapes how much copper you’ll need to add.
Step 2: Clean and Degrease the Surface
Cleanliness decides everything here. Sand the surface lightly to knock back oxide, then wash it with degreaser and rinse thoroughly in distilled water.
The goal is a spotless surface, free of grease, oils, and fingerprints. Any residue left behind keeps fresh copper from bonding evenly, and that’s how you end up with patchy, flaking results.
Step 3: Prepare the Plating Solution
Mix your copper sulfate solution to the concentration the instructions call for, using a clean tank. Precision matters more than you’d think, since an off-balance solution plates unevenly.
Some setups ask you to warm the solution slightly. If yours does, follow that guidance, because a touch of warmth can encourage steadier, more even deposits.
Step 4: Set Up the Plating Circuit
Connect the copper anode to the positive terminal of your power supply, and the workpiece to the negative terminal. This polarity is what pulls copper from the anode onto your piece.
Suspend both in the solution without letting them touch, and space them evenly. A balanced gap encourages uniform coverage rather than a thick patch on one side and a thin film on the other.
Step 5: Apply Controlled Current
Switch on the power supply at a low, steady current. This is the part where patience genuinely pays off.
Gentle plating builds a smooth, well-bonded layer that holds tight to the copper beneath. Crank the current too high, though, and you get rough, brittle copper that flakes away and never adds reliable weight. Slow wins here, every time.
Step 6: Build Thickness Gradually
Let the piece plate over time, and resist the urge to rush it. Check on it periodically, lifting it out to reweigh and track your gains against that baseline.
Then continue in stages. Plate, weigh, plate again, watching the number climb until the added copper reaches your target weight. It’s a rhythm more than a single event.
Step 7: Rinse, Dry, and Finish
When you’ve hit your goal, remove the piece and rinse it thoroughly in distilled water to wash off any lingering solution. Dry it fully so no moisture lingers to cause spotting.
Then polish the new surface. A bit of buffing brings the fresh copper up to a clean shine, so the heavier piece looks as good as it now feels in the hand.

Alloying and Mass-Based Alternatives
Plating isn’t the only road, and it isn’t always the right one. Depending on your goal, two other methods may serve you better.
Melting and Alloying for Density
If you want to change the metal itself, melting copper in a crucible and blending it with a denser element can raise both weight and density. The piece comes out fundamentally heavier per unit of volume.
This is serious work, though. It requires a furnace, real heat, and careful handling, and the alloy you create will behave differently from pure copper. It’s rewarding, but it isn’t a beginner’s first project.
Filling and Bonding for Added Mass
For a far gentler approach, consider adding mass mechanically. Filling a hollow copper piece with a heavier core gives you weight without any chemistry at all.
Bonding an extra copper sheet to a base works similarly, building up solid material where it counts. These methods skip the plating tank and the furnace entirely, which makes them appealing when you just need heft and don’t fancy the fuss.
Common Mistakes to Avoid
A couple of predictable errors waste material and patience. Knowing them ahead of time costs nothing.
Poor Cleaning and Uneven Plating
The most common failure traces back to prep. Skip the degreasing or rush the cleaning, and you leave grease and oxide on the surface.
That residue ruins the bond. The new copper goes on patchy, flakes off, and never builds the even weight you were after. Thorough cleaning isn’t the boring part to skip; it’s the foundation everything else rests on.
Too Much Current or Impatience
The other big slip is hurrying the current. Turning up the power to speed things along feels productive, but it backfires.
High current produces rough, brittle, poorly attached deposits that crumble rather than hold. Slow, steady plating gives you the strongest, smoothest layer, so let the process take the time it needs.
When to Call a Professional
Plenty of this sits comfortably in a home workshop range. Still, some situations call for an expert, and recognizing that is sound judgment rather than giving up.
Alloying that demands precise metallurgy and a proper furnace, for instance, may be more than a hobby setup should attempt. The same goes for large-scale or industrial plating, and for projects with strict weight tolerances where close enough won’t do.
Anything involving hazardous chemicals beyond a basic home process is another good reason to hand it off. A professional plater or metalworker brings the equipment, the controlled chemistry, and the safe disposal that demanding jobs require.
Conclusion
So that’s the full picture of how to make copper heavier, from a clear weight goal to a polished, weightier finish. What starts as a frustrating limitation turns into a controlled, oddly satisfying skill once you understand your options.
Think back through the path. You define the weight you need, choose between plating, alloying, and adding mass, prep the surface with care, then plate in slow and steady stages before finishing for a clean look.
Start small. Weigh as you go, and respect both the chemicals and the patience the process quietly rewards.
Careful prep and a gentle, steady hand are what separate flaking, uneven results from strong, lasting copper. So gather your supplies, begin with a practice piece, and enjoy watching that copper grow heavier with each careful stage.

About
Stuart Rich is a distinguished figure in the world of metalworking and fabrication, with a decade of expertise creating innovative and sustainable metal projects. His professional focus lies in merging traditional blacksmithing and machining with modern manufacturing techniques, fostering designs that are both practical and durable. As the author of Metalenify, Stuart Rich delves into the art and science of metallurgy and DIY metal creation, inspiring artisans, hobbyists, and industry professionals alike.
Education
RMIT University
(Melbourne, Australia)
Associate Degree in Engineering Technology (Mechanical / Manufacturing)
Focus on metallurgical properties, industry-driven projects, and practical metal craftsmanship. Gained hands-on experience with traditional machining and digital manufacturing tools, such as CAD, CNC software, and precision welding equipment.
Nottingham Trent University
(United Kingdom)
Bachelor’s in Product Design and Materials Engineering (Honors)
Specialized in product design with a heavy focus on blending creativity with metal production and fabrication techniques. Participated in real-world industry projects, collaborating with architectural and hardware manufacturing companies to optimize material efficiency.
Publications and Impact
In Metalenify, Stuart Rich shares his insights on structural metal design processes, material grades, and strategies for efficient shop production. His writing bridges the gap between raw artisan knowledge and modern industrial needs, making it a must-read for both budding DIY metalworkers and seasoned fabrication professionals.