A pulley spins free in your hand, yet the bushing underneath clamps to the shaft like it has no intention of letting go. You tug, you twist, and nothing moves.
I remember the first time I met one of these. I assumed brute force would settle it, which only proved how little I understood the design.
Here’s the thing worth knowing up front. Learning how to remove a taper lock bushing is far less of a fight once you understand how it grips, because these clever little parts are built to come apart cleanly when you redirect the force the right way.
This guide walks through what the bushing actually does, the tools that help, and a step-by-step method you can lean on. By the end, that stubborn standoff turns into a quick, almost satisfying job.
What Is a Taper Lock Bushing and How It Works
Before you reach for a wrench, it helps to understand what’s holding everything together. A few seconds of context here may save you a frustrating half hour later.
The Tapered Grip Design
The whole trick lives in the shape. A taper lock bushing has an angled outer surface that wedges between the shaft and the hub of a pulley or sprocket.
As you tighten the bolts, they draw the bushing deeper into that taper. The wedge squeezes tighter, locking the hub to the shaft with surprising strength.
That same wedge action explains why removal feels impossible at first. Pulling straight out does nothing. The bond only breaks when you push the parts apart instead, which is exactly what the design lets you do once you know the secret.
Where You Will Find Taper Lock Bushings
These bushings turn up all over the place once you start noticing them. Pulleys, sprockets, gears, and fan hubs commonly ride on them.
You’ll spot them on conveyors, compressors, and all kinds of industrial drives. The shape stays consistent across machines, so the removal method you learn here carries over no matter what the bushing happens to be holding.
Tools and Materials You Will Need
The right gear turns a maddening standoff into a smooth release. Nothing here is exotic, but having it all within reach before you start makes a real difference.
Essential Hand Tools
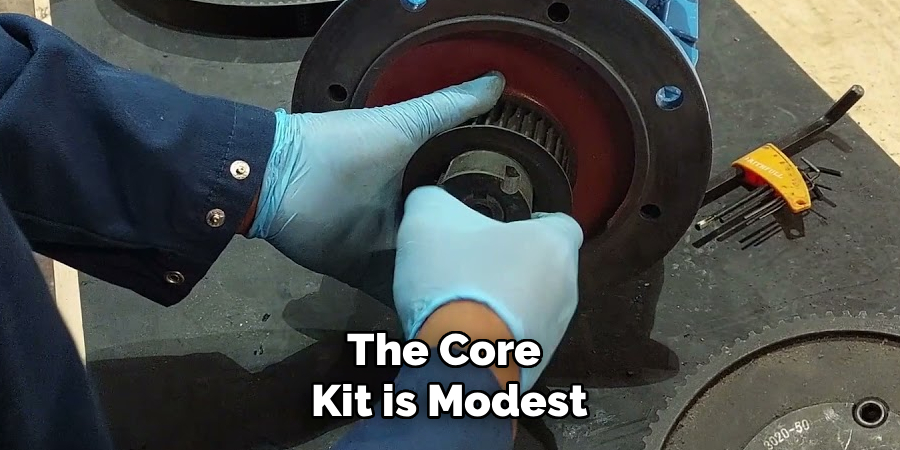
The core kit is modest. A set of hex keys or cap screws, a quality socket set, and a soft-faced mallet cover most jobs.
For the stubborn ones, add a puller. When a bushing refuses to back out under bolt pressure alone, a gear or bearing puller gives you the steady, even force that finally breaks it free.
Helpful Extras and Safety Gear
A few additions smooth out the rough spots. Penetrating oil loosens corrosion, a wire brush clears debris, and a dab of anti-seize makes reassembly easier down the road.
Then there’s the gear that protects you. Safety glasses and gloves cost almost nothing and spare you a slipped tool or a scuffed knuckle. A couple of minutes spent gathering everything beats hunting for a missing hex key mid-job with greasy hands.
Preparing the Bushing and Work Area
Rushing straight to the bolts tends to backfire. A short setup phase shifts the odds in your favor, and it’s worth the time.
Cleaning and Inspecting the Assembly
Start by wiping away the grease and grime. You want to see the grub screws and bolt holes clearly, not guess at them through a layer of dirt.
While you’re at it, look for rust. Corrosion around the bushing may suggest the job will fight back, which tells you to reach for penetrating oil early rather than after you’ve already strained the bolts.
Identifying the Removal Holes
Here’s the detail that changes everything. A taper lock bushing has threaded jacking holes built right into it, and these are the whole reason removal can feel almost effortless.
Take a moment to find them before you touch anything. The same cap screws that pull the bushing tight get moved into these holes to push it back out, so locating them now keeps the rest of the process smooth.
How to Remove a Taper Lock Bushing: Step-by-Step Guide
This is the heart of the job. Knowing how to remove a taper lock bushing really comes down to working a clean sequence, where each step sets up the next, and force gets redirected rather than piled on.
Resist the urge to skip ahead to the puller. The bolts and jacking holes solve most cases on their own, and they protect the shaft from damage. Let each small win carry you forward.
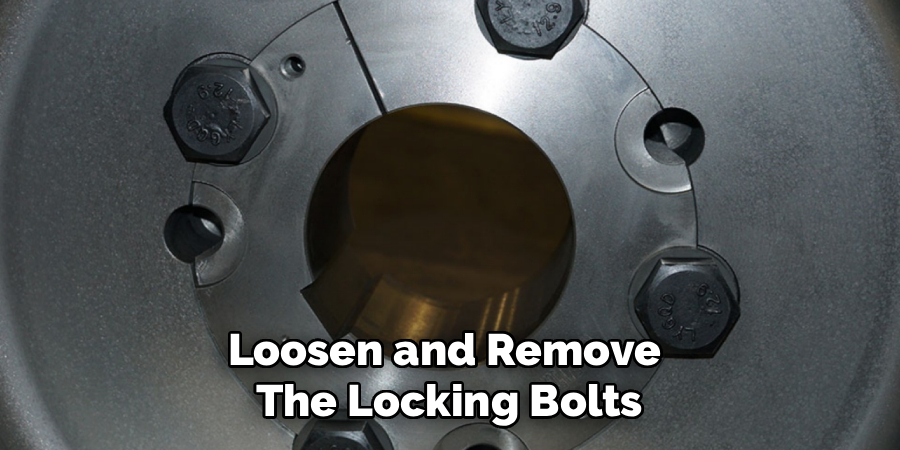
Step 1: Loosen and Remove the Locking Bolts
First, back out the cap screws that draw the bushing tight. Remove them fully, not just a turn or two.
These bolts must be completely free before the wedge will release. Leave one half-tightened, and you’ll fight the design instead of working with it, so take them all the way out.
Step 2: Clean and Inspect the Threaded Holes
Now, clear any debris from the threads. Grit and old anti-seize can make the bolts bind, and a bound bolt risks stripping just when you need it most.
A quick pass with a wire brush or a thread chaser usually does it. Clean threads let the screws move smoothly into the jacking position, which is the next step.
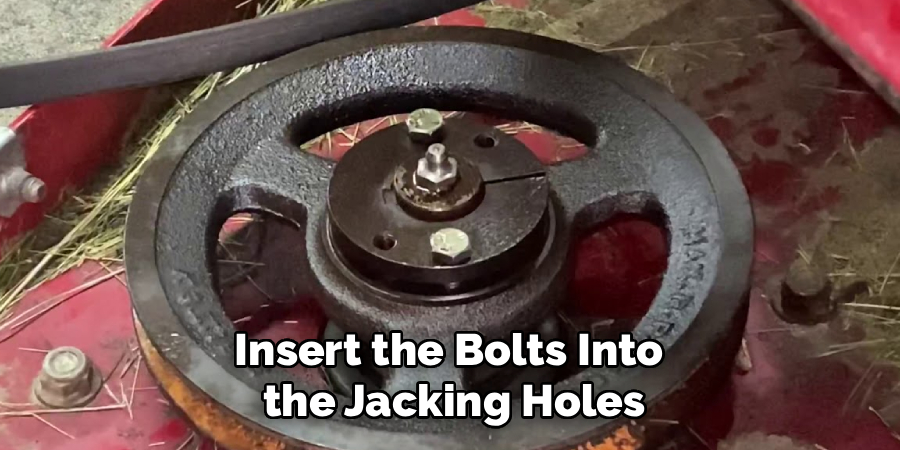
Step 3: Insert the Bolts Into the Jacking Holes
Take those same cap screws and thread them into the bushing’s pull-off holes. This is the move that makes everything click into place.
In these holes, the bolts push against the hub instead of pulling the bushing in. That reversal is what breaks the taper’s grip, so seat the screws and turn them in by hand until they meet resistance.
Step 4: Tighten the Bolts Evenly to Break the Grip
Now tighten each bolt a little at a time, alternating between them. Think of it like snugging lug nuts on a wheel.
Even pressure keeps the bushing from backing out straight rather than cocking sideways. Crank one bolt all the way, and you’ll jam the bushing at an angle, so work them in small, balanced increments and listen for that satisfying crack as the wedge lets go.
Step 5: Apply Penetrating Oil for Stubborn Bushings
If the bushing resists, corrosion is likely the culprit. Back off the bolts slightly, dab penetrating oil around the seam, and give it a few minutes to seep in.
Patience does the work here. That short wait may feel like dead time, but it loosens the rust that’s holding things hostage and spares the shaft from the damage that brute force would cause.
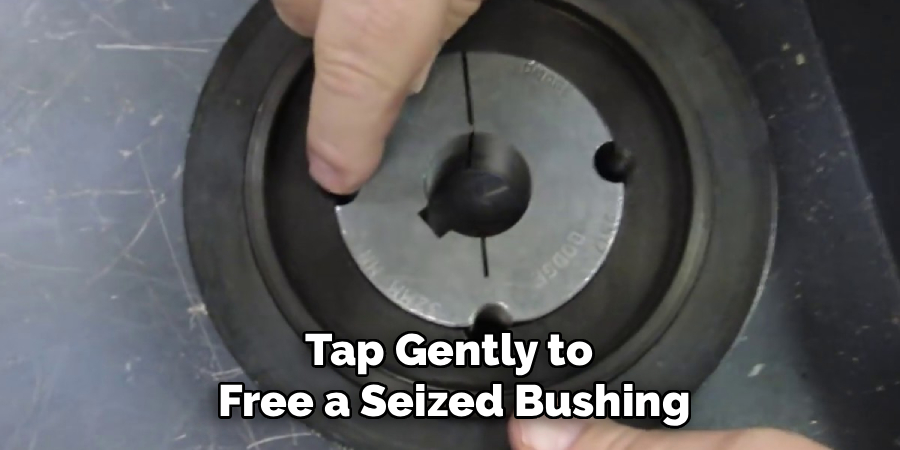
Step 6: Tap Gently to Free a Seized Bushing
Sometimes a stuck bushing just needs a shock. With the jacking bolts under tension, give the hub light, controlled taps with the soft-faced mallet, working around it rather than pounding on one spot.
The goal is persuasion, not violence. A few measured taps can break a stubborn bond loose, and the soft face keeps the metal from picking up dents along the way.
Step 7: Use a Puller for the Toughest Cases
When bolts and tapping both come up short, the puller earns its keep. Seat the jaws securely behind the hub and center the puller screw on the shaft end.
Then tighten gradually, keeping the force straight and even. A puller gives steady, controlled pressure that the alternating bolts sometimes can’t match, and it’s often what finally frees a badly seized bushing without harming the shaft.
Step 8: Slide Off the Pulley and Clean the Shaft
Once the grip breaks, lift the freed hub away and remove the bushing. The hard part is behind you now.
Finish by wiping the shaft clean. Look it over for scoring, rust, or burrs while everything is apart, since this is the easiest moment to catch a problem before the next bushing goes on.
What to Do When the Bushing Will Not Budge
Sometimes a bushing simply refuses. Rust has welded it solid, or a bolt has rounded off, and the standard sequence stalls. You haven’t hit a dead end.
Take a breath. A seized bushing is a solvable challenge, not a lost cause, and a slightly different approach usually gets you there.
Working on a Corroded Bushing Loose
A bushing frozen by rust asks for repeated effort. Soak it with penetrating oil, walk away, and come back to soak it again, letting time do part of the work.
Gentle heat can help too, since warmth expands the hub and loosens corrosion’s grip. Pair that with patient, alternating pressure on the jacking bolts, and a bushing that seems permanent will often give up its hold.
Dealing With Stripped or Damaged Bolts
Bolts sometimes round off or seize right when you need them most. If a head strips, an extractor may catch enough of it to back the bolt out.
For a truly seized bolt, careful drilling can free the threads, though it calls for a steady hand. Go slow here. A rushed cut risks the bushing’s threads, which would turn a manageable job into a much harder one.
Mistakes That Make Removal Harder
Plenty of bushings get harder to remove, not from the original problem, but from a hasty response to it. Knowing the common traps helps you sidestep them.
I’ve made most of these myself, usually more than once. Learning them the easy way beats the alternative.
Forgetting to Use the Jacking Holes
This is the big one. Prying at the bushing or hammering the hub directly, instead of using the built-in pull-off holes, damages both parts and rarely works anyway.
The jacking holes exist for exactly this purpose. Skip them, and you’re fighting the design rather than using it, which is the surest way to round a bolt or scar a hub.
Skipping Lubrication and Even Pressure
Two small oversights cause most of the struggle. Dry, dirty threads make bolts bind, and uneven tightening cocks the bushing sideways in its bore.
Together, they can turn a five-minute job into a long, frustrating fight. A little oil and a steady, alternating turn on the bolts keep things moving the way the design intends.
Tips for Easier Removal Next Time
A bit of foresight today makes the next job smoother. These small habits build ease into your routine.
Applying Anti-Seize Before Reassembly
Rust does much of its damage long before you pick up a wrench. A light coat of anti-seize on the bushing and shaft keeps corrosion from welding the parts together over time.
This matters most for anything exposed to moisture or weather. The dab takes seconds, and it means the bushing backs out cleanly next time instead of fighting you for it.
Keeping the Right Bolts on Hand
The jacking holes only help if you have the bolts to fill them. Store a matching set of cap screws with the equipment, or somewhere you’ll remember.
It’s a small thing that’s easy to overlook until removal day arrives. Having the right screws ready means the built-in feature is always there to use, exactly when you need it.
When to Call a Professional
Knowing your limits is a skill of its own. There’s no shame in stepping back when the stakes climb higher than a DIY fix is worth.
Some situations carry more risk than the job justifies. A heavily seized assembly, a precision drive system, or a shaft where one slip could cause costly damage all fall into that territory.
If you find yourself there, bringing in someone with the right tooling and experience may be the smart move. The cost of expert help often beats the cost of a ruined shaft, and asking for backup is a confident decision rather than a failure.
Conclusion
So there it is. Knowing how to remove a taper lock bushing turns a tight, intimidating standoff into a quick task you can handle with confidence.
The pattern is easy to hold onto. Clean and inspect first, always use the jacking holes, tighten evenly, and reach for oil or a puller before resorting to force. Patience does more of the heavy lifting than muscle ever will.
You’ve got the full roadmap now, from clearing the threads to freeing the worst seized cases without harming the shaft. The next time a bushing clamps down and refuses to move, you won’t feel stuck.
You’ll feel ready. Grab your tools, trust the process, and back that stubborn bushing right out.

About
Stuart Rich is a distinguished figure in the world of metalworking and fabrication, with a decade of expertise creating innovative and sustainable metal projects. His professional focus lies in merging traditional blacksmithing and machining with modern manufacturing techniques, fostering designs that are both practical and durable. As the author of Metalenify, Stuart Rich delves into the art and science of metallurgy and DIY metal creation, inspiring artisans, hobbyists, and industry professionals alike.
Education
RMIT University
(Melbourne, Australia)
Associate Degree in Engineering Technology (Mechanical / Manufacturing)
Focus on metallurgical properties, industry-driven projects, and practical metal craftsmanship. Gained hands-on experience with traditional machining and digital manufacturing tools, such as CAD, CNC software, and precision welding equipment.
Nottingham Trent University
(United Kingdom)
Bachelor’s in Product Design and Materials Engineering (Honors)
Specialized in product design with a heavy focus on blending creativity with metal production and fabrication techniques. Participated in real-world industry projects, collaborating with architectural and hardware manufacturing companies to optimize material efficiency.
Publications and Impact
In Metalenify, Stuart Rich shares his insights on structural metal design processes, material grades, and strategies for efficient shop production. His writing bridges the gap between raw artisan knowledge and modern industrial needs, making it a must-read for both budding DIY metalworkers and seasoned fabrication professionals.