
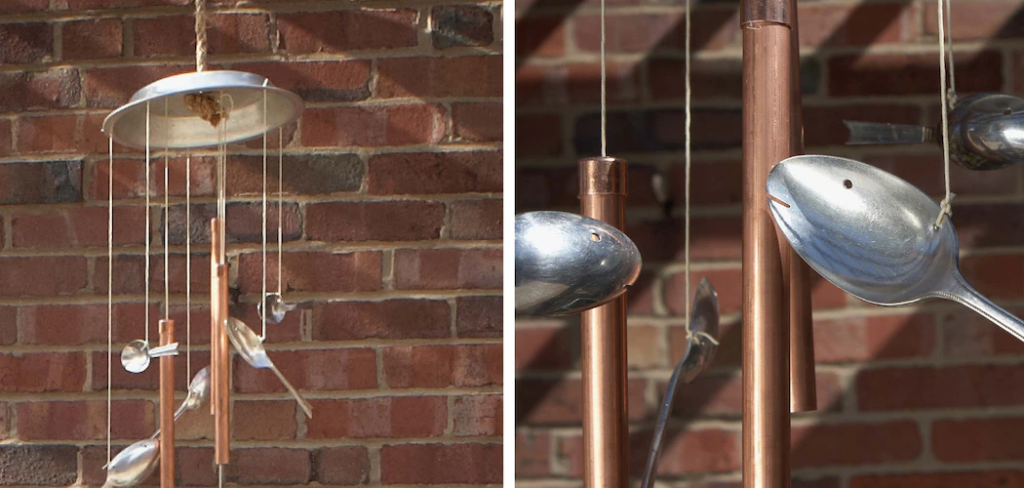
To make metal wind chimes, cut aluminum or copper tubes to staggered lengths and drill hanging holes near their top edges. Suspend these tubes from a wooden or metal top disc using weather-resistant nylon cord. Add a central striker and a flat wind sail, then hang the assembly outdoors. The entire process generally takes two to three hours and costs roughly $20 to $50.
A backyard soundscape often relies on the subtle acoustics of wind chimes. Acoustic resonance generated by metal cylinders striking one another appears to induce a calming psychological effect for many homeowners. Purchasing a pre-made set is always an option, though commercial varieties often lack the specific tonal qualities a homeowner might desire.
Crafting your own audio installation out of basic hardware materials could offer a more satisfying alternative. You retain total control over the scale, the materials, and ultimately the pitch of the final product. Aluminum and copper pipes are readily available at most home improvement stores, waiting to be repurposed into an instrument.
This guide on how to make metal wind chimes details the specific mechanical steps required to construct a functional, aesthetically pleasing set of metal wind chimes. We will examine material selection, the physics of tube length, and the specific assembly techniques that prevent acoustic dampening.
Essential Tools and Materials for Building Metal Wind Chimes
Gathering the correct components beforehand makes the mechanical process significantly smoother. Sourcing high-quality materials may suggest a longer lifespan for the finished piece.
- Metal tubing. Aluminum generally produces a bright sound, while copper yields warmer notes.
- A hacksaw or a dedicated pipe cutter.
- A power drill equipped with a standard metal bit.
- A measuring tape and a permanent marker.
- Weather-resistant nylon cord.
- A solid top disc made of wood or metal.
- A striker. This is the flat disc that physically hits the tubes.
- A wind sail to catch passing breezes.
- Basic sandpaper or a metal hand file.
- A heavy-duty hanging ring.
Choose aluminum tubing with a 1/16-inch wall thickness if clear vibration matters more than visual weight. This specific thickness strikes an ideal balance between durability and acoustic resonance.
7 Simple Steps on How to Make Metal Wind Chimes
The assembly process requires precision. Rushing through the measurements could result in a discordant mess rather than a musical instrument.
Step 1: Measuring and Marking Metal Tubing for Accurate Pitch
The physical length of a metal tube dictates its fundamental frequency. Extended tubes generate deeper frequencies, while shorter segments produce higher pitches. A standard configuration usually involves five distinct tubes.
You might start with a base tube measuring exactly 18 inches. Following that, mark each subsequent tube exactly one inch shorter than the previous one. Double-check the markings against your tape measure. A miscalculated cut is permanent.
Step 2: Best Method for Cutting Metal Chime Tubes
Securing the material is your first priority. A bench vise holds the pipe perfectly still, though heavy-duty clamps offer a reasonable substitute.
A rotary pipe cutter yields a perfectly square edge, which appears to indicate better acoustic performance. If you only have a hacksaw, apply gentle downward pressure and let the blade’s teeth do the actual severing. Line up the finished pieces side by side to verify the staggered lengths.
Step3: How Smoothing Metal Edges Improves Chime Resonance
Freshly severed metal invariably retains jagged burrs along the cut line. These imperfections absorb kinetic energy and dampen the resulting sound wave.

Run a medium-grit metal file around both the interior and exterior lips of every tube. You want the metal to feel entirely smooth against bare skin. Wipe away the microscopic metal dust with a damp rag before proceeding.
Step 4: Drilling Hanging Holes Without Denting Metal Tubing
Suspension requires precise anchor points. Mark a distinct dot exactly one inch below the top rim of every tube. Mark a corresponding dot perfectly opposite the first one.
Applying too much pressure with the drill could crush the thin aluminum wall. Squeeze the trigger gently. Passing the cord straight through both walls ensures the pipe hangs perfectly vertical, which is necessary for consistent striking.
Step 5: Configuring the Top Disc and Striker in Wind Chimes

The top suspension disc acts as the structural foundation. Plot the anchor holes in a wide, even circle. You want the resting tubes to maintain a gap of at least one inch between their neighbors.
The striker sits lower in the assembly. Drill a single hole directly through its center point. This component must hang at a height where its edge can physically reach the midpoint of the shortest tube.
Step 6: Stringing and Balancing Wind Chimes Properly
Assembly requires patience and reliable knot-work. Cut equal lengths of your nylon cord for the main suspension lines. Feed the cord through the drilled pipe holes and tie a standard square knot.
Attach the opposite ends to the perimeter holes on the top disc. Next, run a central line straight down through the disc to suspend the striker. Hang the wind sail from the bottom of the striker using another brief length of cord.
Step 7: Hanging and Fine-Tuning Finished Wind Chimes
Affix a steel ring to the dead center of the top disc. Suspend the entire rig from a sturdy tree branch or a dedicated porch hook.

Push the wind sail gently and observe the mechanics. If a particular note sounds muffled, the cord might be restricting the pipe’s natural vibration. Minor adjustments to the string tension or striker height may resolve these acoustic dead zones.
Following these steps on how to make metal wind chimes will help you achieve a harmonious and visually appealing addition to your outdoor space.
What Are the Most Common Mistakes When Making Wind Chimes?
Poor measurement remains the primary cause of acoustic failure in DIY wind chimes. Guessing the lengths rather than using a tape measure usually produces clashing frequencies.
Neglecting the filing process causes physical injury during assembly and degrades the final sound quality. Cramming the tubes too tightly on the top disc causes them to constantly bump one another, creating a chaotic clatter. Utilizing standard cotton string instead of nylon cord guarantees structural failure after a few heavy rainstorms.
Should You Hire a Professional to Make Metal Wind Chimes?

Most homeowners possess the basic dexterity required for this task. The tools are common, and the raw materials are forgiving.
However, achieving a precise musical scale—such as a perfect pentatonic arrangement—might require the ear of an experienced instrument maker. Choose a professional artisan if absolute acoustic perfection matters more than the satisfaction of a weekend project.
How Much Does a DIY Metal Wind Chime Project Actually Cost?
Raw aluminum pipe generally retails between $15 and $25 at hardware stores. The miscellaneous hardware and cordage rarely exceed $10 in total.
Assuming you already own a drill and a saw, the out-of-pocket expense sits comfortably near $30. Commercial units of similar material thickness often command prices exceeding $80.
Frequently Asked Questions
Q1: What Type of Metal Produces the Best Wind Chime Sound?
Aluminum serves as the most reliable material for amateur builders. It resists heavy corrosion, cuts easily with basic hand tools, and generates a distinctly clear tone. Copper offers a noticeably warmer, lower frequency, but it oxidizes rapidly and costs significantly more per linear foot.
Q2: How Exactly Do You Tune a DIY Metal Wind Chime?
Pitch correlates directly to the physical length of the cylinder. You adjust the note by cutting the pipe shorter to raise the frequency. Achieving specific musical notes requires a digital tuner and incremental shaving of the metal until the exact frequency is reached.
Q3: How Long Does the Entire Wind Chime Assembly Process Take?
A focused individual with all materials present can finish the construction in approximately three hours. The measuring and cutting phases demand the majority of that time block.
Q4: How Can I Personalize My Wind Chime?
There are many ways to personalize your wind chime, such as using different materials for the pipes or adding decorative elements like beads or charms. You can also paint or stain the wooden parts of the wind chime to add a unique touch.
Q5: Are There Different Designs for Wind Chimes?
Yes, there are various designs for wind chimes. Some popular styles include traditional Japanese or Chinese-inspired designs, modern and minimalist styles, and whimsical or nature-themed designs. You can also customize the design of your wind chime to fit your personal preferences and style. Additionally, there are different types of wind chimes, such as bamboo, metal, glass, ceramic, and more, that offer a wide range of design options. With so many choices available, you can find the perfect wind chime that fits your aesthetic and adds beauty to your outdoor space.
The Final Note on Your Backyard Soundscape
Constructing your own outdoor acoustic instruments offers a quiet sense of control over your environment. Precision in your cuts and care in your assembly will yield a durable fixture that responds musically to passing weather patterns.
Pick up the aluminum, verify your measurements twice, and see what kind of resonance you can create. Thanks for reading this guide on how to make metal wind chimes.

About
Stuart Rich is a distinguished figure in the world of metalworking and fabrication, with a decade of expertise creating innovative and sustainable metal projects. His professional focus lies in merging traditional blacksmithing and machining with modern manufacturing techniques, fostering designs that are both practical and durable. As the author of Metalenify, Stuart Rich delves into the art and science of metallurgy and DIY metal creation, inspiring artisans, hobbyists, and industry professionals alike.
Education
RMIT University
(Melbourne, Australia)
Associate Degree in Engineering Technology (Mechanical / Manufacturing)
Focus on metallurgical properties, industry-driven projects, and practical metal craftsmanship. Gained hands-on experience with traditional machining and digital manufacturing tools, such as CAD, CNC software, and precision welding equipment.
Nottingham Trent University
(United Kingdom)
Bachelor’s in Product Design and Materials Engineering (Honors)
Specialized in product design with a heavy focus on blending creativity with metal production and fabrication techniques. Participated in real-world industry projects, collaborating with architectural and hardware manufacturing companies to optimize material efficiency.
Publications and Impact
In Metalenify, Stuart Rich shares his insights on structural metal design processes, material grades, and strategies for efficient shop production. His writing bridges the gap between raw artisan knowledge and modern industrial needs, making it a must-read for both budding DIY metalworkers and seasoned fabrication professionals.





