
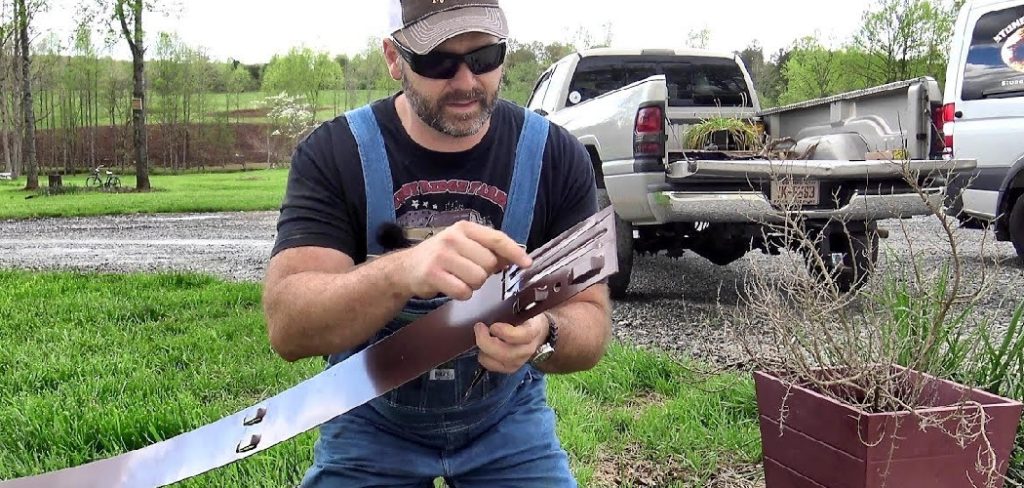
Steel landscape edging is one of the simplest upgrades you can make to give your yard a clean, professional finish. It creates sharp borders between your lawn, garden beds, walkways, and gravel paths, keeping everything neatly in its place. If you’ve ever struggled with grass creeping into your flower beds or mulch spilling onto your sidewalk, you already know why a solid edge matters.
The good news is that learning how to install steel landscape edging doesn’t require special training or a contractor. With a few basic tools and a free afternoon, you can transform messy borders into crisp, defined lines that last for years. Steel is durable, flexible enough to follow curves, and far stronger than plastic alternatives.
This guide walks you through everything from planning your layout to securing the final stake. Whether you’re a complete beginner or someone looking to sharpen your DIY skills, you’ll find clear, step-by-step instructions written for all experience levels. By the end, you’ll have the confidence to tackle the project yourself and enjoy results that boost your home’s curb appeal.
Why Steel Landscape Edging Matters
Steel edging does more than just look good. It solves real problems that frustrate homeowners year after year. Unlike plastic edging, which cracks in cold weather and warps in the heat, steel holds its shape and resists damage from mowers, foot traffic, and shifting soil. That means fewer replacements and less maintenance over time.
It also acts as a barrier, stopping aggressive grass roots and weeds from invading your garden beds. This keeps your planting areas tidy and reduces the time you spend weeding. On top of that, steel bends easily around curves, so you can create flowing, custom shapes that match your landscape design. With a long lifespan and minimal upkeep, steel edging delivers excellent value, making it a smart choice for anyone who wants lasting, attractive borders.
Step-by-Step Guide to How to Install Steel Landscape Edging
Step 1: Plan And Measure Your Layout
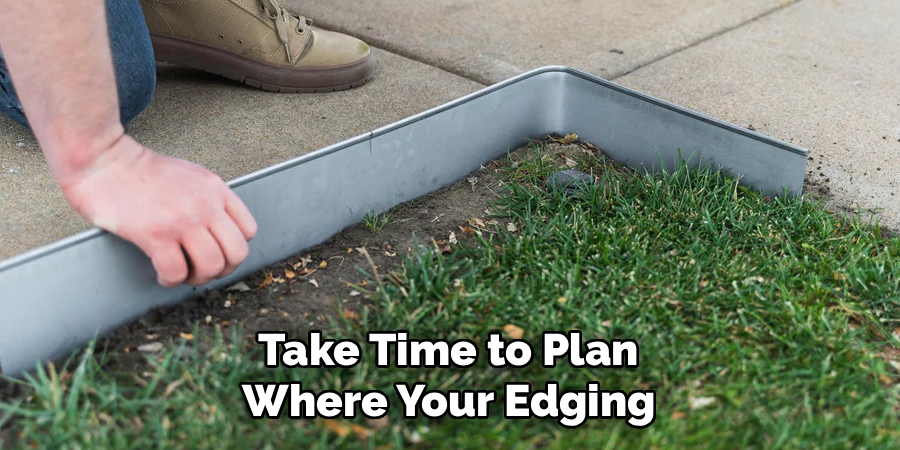
Before you pick up a single tool, take time to plan where your edging will go. Walk through your yard and decide which beds, paths, or borders need defining. Use a garden hose or rope to lay out the shape you want, especially for curved sections, since this gives you a clear visual guide.
Once you’re happy with the layout, measure the total length with a tape measure. This tells you how many edging strips and stakes to buy. Buying a little extra is smart, as it covers mistakes and gives you backup pieces. A solid plan now saves you time and frustration later in the project.
Step 2: Gather Your Tools And Materials
Having everything ready before you start keeps the work smooth and stress-free. For learning how to install steel landscape edging, you’ll need steel edging strips, connecting stakes, a rubber mallet, a spade or flat shovel, work gloves, and safety glasses. A string line and measuring tape help keep your lines straight and accurate.
Lay all your materials out near your work area so you’re not running back and forth. Wear sturdy gloves, because steel edges can be sharp. Good preparation reduces errors and makes the entire job feel manageable, even if this is your first time tackling a landscaping project of this kind.
Step 3: Dig A Trench Along The Edge
Now it’s time to prepare the ground. Using your spade or flat shovel, dig a narrow trench along the line you marked earlier. Aim for a depth that lets the edging sit slightly above the soil, usually around three to five inches, depending on your product.
Keep the trench as straight and even as possible, following your hose or string guide. Remove any rocks, roots, or debris that could block the edging from sitting flush. Take your time here, since a clean, consistent trench makes the next steps far easier. A well-dug trench is the foundation for a professional-looking finish.
Step 4: Position The Steel Edging
With your trench ready, set the first strip of steel edging into place. Press it down so it rests at your desired height, leaving a small lip above the soil to hold back grass and mulch. Check the top edge with a level to make sure it sits evenly along the line.
This stage is the heart of how to install steel landscape edging correctly, so don’t rush it. For curved areas, gently bend the steel with your hands or knee to match your layout. Make small adjustments as you go, ensuring each section follows your planned shape smoothly before you connect the next piece.
Step 5: Connect The Sections Together
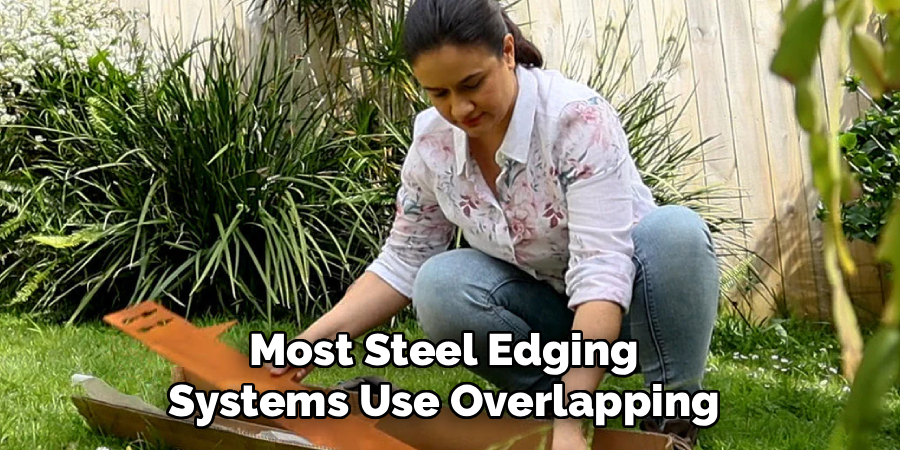
Most steel edging systems use overlapping ends or connector slots to join one strip to the next. Slide the pieces together so they form a continuous, seamless line with no gaps. A tight connection prevents shifting and keeps the whole border feeling solid and stable.
If your sections overlap, line up the holes so the stakes can pass through both pieces at once. This locks them firmly in place. Double-check the alignment before moving on, since gaps or loose joints can weaken the structure. A well-connected border looks cleaner and holds up better against weather and regular yard use.
Step 6: Drive In The Stakes
Stakes are what hold your edging firmly in the ground, so this step is essential. Insert each stake through the designated holes or slots in the steel, then drive it down using your rubber mallet. A rubber mallet is better than a metal hammer because it protects the steel from dents.
Space the stakes evenly, usually every few feet, and add extra ones around tight curves for added strength. Drive each stake until its top sits flush with the edging. Work steadily and check that the edging stays level as you go. Secure staking keeps your border straight and prevents it from lifting over time.
Step 7: Backfill And Finish The Edge
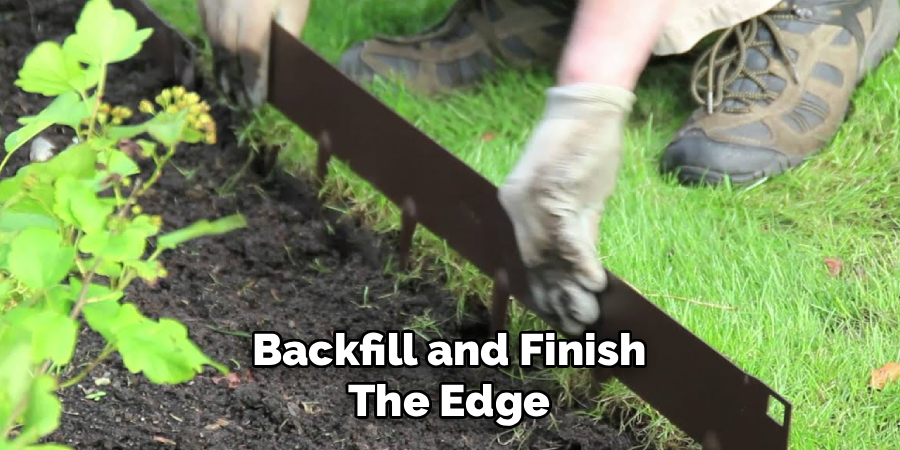
The final step brings everything together. Push the soil you removed earlier back into the trench on both sides of the edging, pressing it down firmly to lock the steel in place. This backfilling step adds stability and hides the lower portion of the edging for a tidy look.
Tamp the soil with your foot or a tool to remove air pockets, then add mulch, gravel, or grass seed as needed to complete your design. Step back and inspect your work, making minor adjustments where necessary. With the soil packed and the surface finished, your new steel border is ready to enjoy for years to come.
Frequently Asked Questions
How Deep Should Steel Landscape Edging Be Installed?
Most steel edging should be buried so that about one to two inches sits above the soil, while the rest stays below ground. This usually means digging a trench three to five inches deep, depending on the product height. Keeping the right depth ensures the edging holds back grass and mulch effectively while staying firmly anchored against shifting soil and weather.
Can I Install Steel Edging On Curves?
Yes, and this is one of steel’s biggest advantages. Steel edging is flexible enough to bend smoothly around curves and rounded beds. You can shape it gently by hand, with your knee, or against a firm surface. For tighter curves, add extra stakes to hold the shape securely. This flexibility lets you create flowing, custom designs that plastic edging simply can’t match.
What Tools Do I Need For The Job?
You’ll need a few basic tools that most homeowners already own. A spade or flat shovel digs the trench, a rubber mallet drives the stakes without denting the steel, and a tape measure keeps your layout accurate. Work gloves and safety glasses protect you from sharp edges. A string line or garden hose also helps you mark straight or curved lines clearly.
How Long Does Steel Landscape Edging Last?
Steel edging is built to last, often holding up for fifteen to twenty years or more. Galvanized or powder-coated options resist rust and corrosion, extending their lifespan even further. Unlike plastic, which cracks and fades, steel maintains its strength and shape through harsh weather, freezing temperatures, and regular yard activity. With minimal upkeep, it remains a reliable, long-term solution for clean garden borders.
Is Steel Edging Better Than Plastic?
In most cases, yes. Steel edging is far more durable, resists warping, and keeps its shape under pressure from mowers and foot traffic. While plastic costs less upfront, it tends to crack, fade, and shift over time. Steel offers a cleaner look, better longevity, and stronger weed control. For homeowners wanting lasting results, the extra investment in steel is usually well worth it.
Conclusion
Creating sharp, professional borders around your garden is easier than you might think. By planning your layout, digging a clean trench, positioning and connecting your steel strips, securing them with stakes, and backfilling the soil, you can complete the entire project in a single afternoon. Each step builds on the last, so working carefully from start to finish gives you the best results.
Now that you understand how to install steel landscape edging, you have everything you need to transform messy, undefined borders into crisp, lasting lines. Steel edging rewards your effort with durability, low maintenance, and a polished look that boosts your home’s curb appeal for years. So gather your tools, follow these steps at your own pace, and enjoy the satisfaction of a job well done. Your yard is waiting.

About
Stuart Rich is a distinguished figure in the world of metalworking and fabrication, with a decade of expertise creating innovative and sustainable metal projects. His professional focus lies in merging traditional blacksmithing and machining with modern manufacturing techniques, fostering designs that are both practical and durable. As the author of Metalenify, Stuart Rich delves into the art and science of metallurgy and DIY metal creation, inspiring artisans, hobbyists, and industry professionals alike.
Education
RMIT University
(Melbourne, Australia)
Associate Degree in Engineering Technology (Mechanical / Manufacturing)
Focus on metallurgical properties, industry-driven projects, and practical metal craftsmanship. Gained hands-on experience with traditional machining and digital manufacturing tools, such as CAD, CNC software, and precision welding equipment.
Nottingham Trent University
(United Kingdom)
Bachelor’s in Product Design and Materials Engineering (Honors)
Specialized in product design with a heavy focus on blending creativity with metal production and fabrication techniques. Participated in real-world industry projects, collaborating with architectural and hardware manufacturing companies to optimize material efficiency.
Publications and Impact
In Metalenify, Stuart Rich shares his insights on structural metal design processes, material grades, and strategies for efficient shop production. His writing bridges the gap between raw artisan knowledge and modern industrial needs, making it a must-read for both budding DIY metalworkers and seasoned fabrication professionals.





