To successfully paint stainless steel black, you must first thoroughly clean and degrease the surface. Next, scuff the metal with fine-grit sandpaper to create a bonding texture, apply an etching primer designed for metal, and finish with two to three coats of high-quality black enamel or epoxy paint.
Turning bright metal fixtures into dark, understated accents is one of the more satisfying low-cost upgrades you can make to an appliance, a piece of hardware, or an automotive component. The catch is that stainless steel has a smooth, non-porous surface that gives liquid coatings almost nothing to grab onto. Skip the right preparation steps, and you will almost certainly end up with paint that peels within weeks.
With the correct abrasion technique, a specialized etching primer, and a little patience between coats, though, the result can look genuinely professional. This guide on how to paint stainless steel to black walks through each stage in order, including the tools you need, where beginners typically go wrong, and what to realistically expect from the finished surface.
What Tools and Materials You’ll Need
Before you begin, gather the following essential tools and materials. Having everything prepared will make the process smooth and prevent any interruptions while the paint or primer is curing.
- A heavy-duty degreaser or trisodium phosphate (TSP) cleaner
- Warm water, dish soap, and a sponge or clean microfiber cloths
- Fine-grit sandpaper (around 150-grit to 220-grit) or a scuff pad
- Painter’s tape and drop cloths or old newspapers to protect surrounding areas
- A high-quality self-etching primer formulated specifically for bare metal
- Black metal paint (epoxy, enamel, or a high-heat paint if used on appliances)
- A clear protective topcoat or sealant suitable for metal surfaces
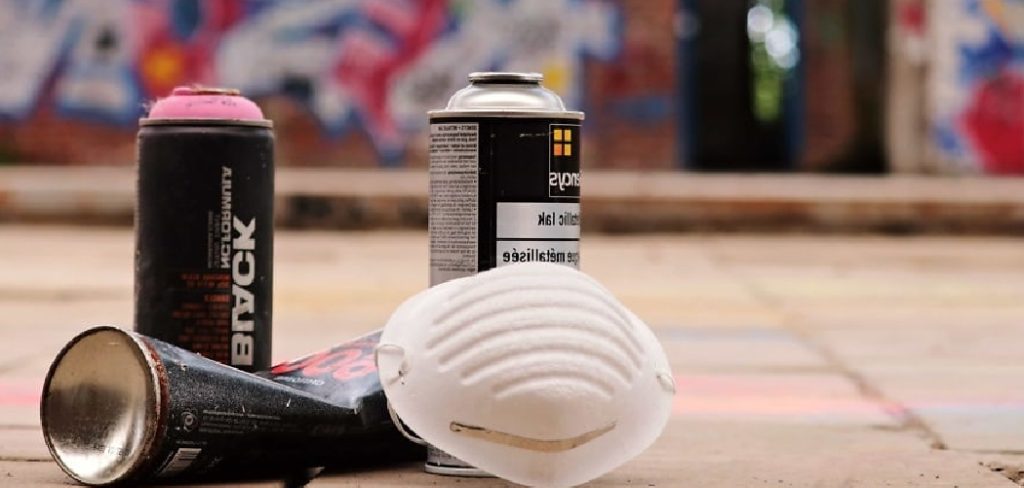
- Safety gear, including a respirator mask, safety goggles, and nitrile gloves
7 Simple Step-By-Step Guidelines on How to Paint Stainless Steel to Black
Step 1: Thoroughly Clean and Degrease the Surface
Start by removing every trace of oil, grease, dirt, and fingerprints from the stainless steel. This matters more than most people assume. Because stainless steel gets handled frequently, skin oils accumulate in a thin, nearly invisible layer that can prevent primer from bonding at all. Use a commercial degreaser or a strong solution of warm water and dish soap, and scrub the entire surface carefully.
Rinse with clean water, then dry the piece completely using a lint-free cloth. Residual moisture and leftover cleaning chemicals can each interfere with primer adhesion in their own way — one by trapping humidity beneath the coating, the other by disrupting the chemical bond. A clean base is not optional; it is the condition everything else depends on.
Step 2: Protect the Surrounding Workspace
Once the metal is dry, shift your attention to the workspace itself. If possible, move the object outside or into a well-ventilated garage — the fumes from self-etching primers and enamel paints are genuinely strong and should not be inhaled in an enclosed space without serious respiratory protection. Lay down drop cloths, plastic sheeting, or layered newspaper to catch any overspray.
For fixtures or appliances that cannot be relocated, apply high-quality painter’s tape carefully along any edges, glass panels, or adjacent surfaces. Press the tape edges down firmly. A few extra minutes spent masking neatly are much easier than scraping dried black paint off adjacent surfaces later — a lesson most people only learn once.
Step 3: Sand the Stainless Steel to Create a Profile
Because stainless steel is so smooth, liquid coatings have no physical texture to anchor to, which makes sanding a non-negotiable part of this process. Wearing safety goggles and a dust mask, use 150-grit to 220-grit sandpaper or an abrasive scuff pad to work over the entire surface. Consistent, circular motions tend to produce more even results than back-and-forth strokes alone.
The objective is not to gouge the metal. You are trying to create what surface prep professionals call a “profile” or “tooth” — a microscopic texture the primer can physically lock into. When the piece looks uniformly dull and the original gloss is gone, use a tack cloth or a rag lightly dampened with mineral spirits to remove all the fine metal dust. Any particulates left behind at this stage will show up in the finished surface as small bumps.
Step 4: Apply a Specialized Self-Etching Primer
Standard wood or drywall primer will not adhere to bare stainless steel — it simply lacks the chemical properties needed to bond with non-porous metal. Self-etching primer is different. It contains mild acid compounds that microscopically bite into the metal surface, forming a chemical bond that mechanical abrasion alone cannot fully replicate. Shake the can for at least two minutes before use, then hold it roughly eight to twelve inches from the surface and apply a thin, even first coat using steady sweeping passes.
Allow that coat to dry according to the manufacturer’s guidance — usually five to ten minutes — then apply a second light coat for full coverage. Let the final primer coat cure completely before moving on. Most manufacturers recommend at least one to two hours, and resisting the urge to rush this stage is worth it.
Step 5: Sand the Primer for a Perfectly Smooth Base
Once the primer has cured, run your fingertips across it. There may be a slight grit or an uneven texture where the etching compound has done its work. A light pass with 400-grit sandpaper addresses this. The key word is light — you want to smooth down any high spots without cutting through the primer layer back to bare metal.
After sanding, wipe the surface down once more with a dry tack cloth to clear the primer dust. This intermediate step gets skipped often, particularly by people who are eager to get to the color stage. It is one of the more meaningful differences between a finish that looks painted and one that looks applied with care.
Step 6: Apply the Black Metal Paint
This is where the visible transformation happens. Whether you chose matte, satin, or gloss black, apply the paint the same way you applied the primer: thin coats, held eight to twelve inches from the surface, with sweeping passes that extend slightly past the edges of the object. Starting and stopping the spray directly over the piece tends to cause heavier buildup at the edges.
Three thin coats will almost always outperform one thick coat. Heavy single applications are prone to running, dripping, and uneven drying — and once the paint sags, recovering the surface cleanly is difficult. Wait the time specified on your product label between coats, typically 15 to 30 minutes, and build up the color gradually until no primer is visible through the layers.
Step 7: Apply a Clear Protective Topcoat
Black paint on a metal surface looks sharp, but it is more vulnerable to scratching and chipping than it may appear. A clear topcoat adds a meaningful layer of protection, particularly for objects that see regular handling. Choose a sealant that is labeled as compatible with both metal surfaces and the specific paint type you used — not all clear coats are chemically compatible with all paint formulations.
Apply the topcoat using the same thin, sweeping technique as the previous stages. Then let it cure undisturbed for 24 to 48 hours before handling the piece, reinstalling it, or exposing it to water. The surface may feel dry to the touch within an hour or two, but the underlying curing process — where the coating achieves its actual hardness — takes considerably longer. Giving it the full window pays off in durability.
Following these steps on how to paint stainless steel to black, you can achieve a sleek and modern look to any stainless steel surface.
What Are the Common Mistakes to Avoid?
The most frequent mistake is skipping the sanding step, often because it seems like extra work when a quality primer is in hand. It is not. Another common error is applying thick, heavy coats of paint to speed up coverage, which tends to produce drips and a surface that chips along edges.
Failing to clean off skin oils before priming is a quieter failure — the paint may look fine initially but begins to bubble and lift over time. And using a general-purpose primer rather than a self-etching metal primer is perhaps the most structurally significant mistake, because no amount of careful application compensates for a primer that cannot bond chemically with the substrate.
Do You Need to Use Professionals?
For most DIY applications, this project is entirely manageable with household tools and materials from a hardware store. That said, there are situations where professional help makes practical sense. Large commercial appliances, vehicle components that require automotive-grade clear coating, or projects without access to a well-ventilated spray space all carry added complexity.
Professionals work in spray booth environments with controlled airflow, and they have access to two-part epoxy systems and industrial curing methods that are simply not available in aerosol cans. For high-value items or surfaces subject to heavy physical wear, powder coating may offer a more durable long-term result than any brush or spray paint application.
How Much Will It Cost to Paint Stainless Steel Black?
The DIY cost is fairly modest. A self-etching primer typically runs $15 to $25, black metal paint around $10 to $20, and consumables like sandpaper, degreaser, and masking tape add roughly another $15. Total material costs generally fall between $40 and $60, depending on object size and brand choices.
Professional painting or powder coating on a larger piece — a refrigerator door panel, for instance — can range from $200 to $500 once labor and industrial materials are factored in. For most household applications, the DIY route is financially sensible.
Frequently Asked Questions
Q1: Can You Use Standard Spray Paint on Stainless Steel?
A1: Standard household spray paint will not hold up on stainless steel without a proper primer underneath. Because the surface is non-porous, the paint has no mechanical or chemical anchor, and peeling tends to follow. A self-etching primer applied first changes that equation by creating the bond that standard primers cannot. After priming, an enamel or epoxy spray paint formulated for metal gives you the most durable result.
Q2: How Long Does Painted Stainless Steel Last?
A2: With thorough surface prep, an etching primer, and a clear topcoat, painted stainless steel can reasonably last five to ten years indoors under normal conditions. Outdoor exposure or high-touch applications like door hardware may shorten that to three to five years before touch-ups are needed. Longevity is largely a function of how carefully the surface was prepared at the outset — the paint itself is almost a secondary factor.
Q3: Is It Necessary to Sand Stainless Steel Before Painting?
A3: Yes. Without scuffing the surface, even a good primer sits on top of the metal rather than bonding to it, and the coating can eventually be peeled away with minimal force. Ten minutes with 150-grit sandpaper creates enough physical texture to make a material difference in how long the finish holds. It is one of the few steps where there is no real workaround.
Wrapping Up Your Black Stainless Steel Project
Painting stainless steel is less about technical skill and more about process discipline. Clean the surface completely, use the right primer, apply thin coats, and give the finish time to cure — those four principles carry the project.
Whether you are updating a dated kitchen fixture or customizing a metal component, the technique is the same. Take the preparation seriously, and the finished surface should hold up well for years. Thanks for reading this guide on how to paint stainless steel to black.
About
Stuart Rich is a distinguished figure in the world of metalworking and fabrication, with a decade of expertise creating innovative and sustainable metal projects. His professional focus lies in merging traditional blacksmithing and machining with modern manufacturing techniques, fostering designs that are both practical and durable. As the author of Metalenify, Stuart Rich delves into the art and science of metallurgy and DIY metal creation, inspiring artisans, hobbyists, and industry professionals alike.
Education
RMIT University
(Melbourne, Australia)
Associate Degree in Engineering Technology (Mechanical / Manufacturing)
Focus on metallurgical properties, industry-driven projects, and practical metal craftsmanship. Gained hands-on experience with traditional machining and digital manufacturing tools, such as CAD, CNC software, and precision welding equipment.
Nottingham Trent University
(United Kingdom)
Bachelor’s in Product Design and Materials Engineering (Honors)
Specialized in product design with a heavy focus on blending creativity with metal production and fabrication techniques. Participated in real-world industry projects, collaborating with architectural and hardware manufacturing companies to optimize material efficiency.
Publications and Impact
In Metalenify, Stuart Rich shares his insights on structural metal design processes, material grades, and strategies for efficient shop production. His writing bridges the gap between raw artisan knowledge and modern industrial needs, making it a must-read for both budding DIY metalworkers and seasoned fabrication professionals.


