Making a custom metal stamp means designing your pattern, transferring it to a hardened steel blank, then using rotary tools or needle files to carve away the negative space. After that, you heat the steel with a blowtorch and quench it in oil — a process that locks in the hardness the stamp needs to survive repeated hammer blows without deforming.
Creating your own metal tools opens a genuinely practical avenue for personalizing jewelry, leather goods, and general metalwork. Rather than settling for mass-produced designs, a custom piece lets you press your exact logo or signature motif directly into your work. The process asks for patience and a steady hand, but leaving a permanent, personalized mark on something you made tends to justify every hour spent at the bench.
Working with hardened steel sounds more complicated than it actually is. You don’t need an industrial workshop. With a handful of hand tools, a methodical approach to carving, and a basic understanding of heat treatment, any dedicated maker can produce a durable, well-finished stamp right at home. In this guide on how to make a metal stamp, we’ll walk through the steps to create a custom stamp that can be used for marking jewelry, leather goods, or even paper.
Tools and Materials You’ll Need
- A hammer (preferably a ball-peen hammer)
- A steel chisel or metal punch set
- Steel stamp blanks (these can be purchased at most craft stores)
- An anvil or solid surface to work on
- Heat source (a propane torch or forge will work)
- Quenching medium (such as water, oil, or air)
- Sandpaper or a file for smoothing edges and finishing touches
7 Simple Step-By-Step Guidelines on How to Make a Metal Stamp
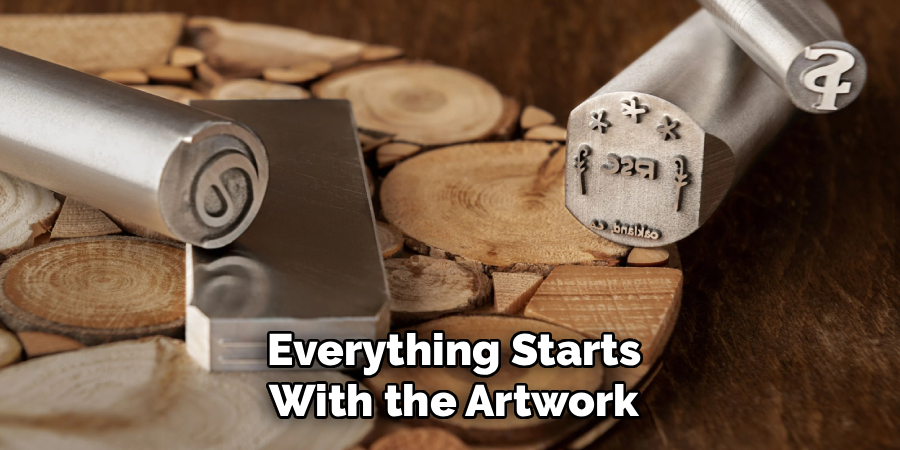
Step 1: Designing Your Custom Stamp Pattern
Everything starts with the artwork. For a first attempt, keeping the design simple is genuinely good advice rather than cautious hedging — fine lines and complex details tend to merge into an indistinct smudge when pressed into metal or leather under load. Bold shapes, initials, clean geometric forms, and minimalist logos consistently produce the clearest impressions.
One thing beginners often overlook: the design must go onto the steel in reverse. Because a stamp transfers an inverted image, any letters or directional symbols will read backward if you carve them as they appear on paper. Sketch the mirrored design on tracing paper, or flip the image horizontally in any basic editing program before printing. Getting this right at the start saves a lot of frustration later.
Step 2: Preparing the Steel Blank Surface
With your design settled, attention shifts to the steel itself. Cut the high-carbon rod to a comfortable working length — somewhere around three to four inches is typical — using a hacksaw or angle grinder. Clamp it firmly in the bench vise so the face you plan to carve points straight up and sits level.
The surface needs to be flat and polished before you transfer anything onto it. Work across the cut face with a flat metal file to remove any bumps or irregularities left by cutting. Follow that with sandpaper, stepping from 220 grit up to around 600, until the face is smooth and largely free of scratches. This matters because any surface marks will show up alongside your design in the final impression — and they’re difficult to explain away as intentional.
Step 3: Transferring the Design to the Metal
A smooth, polished face gives you a clear working surface. To make your scratched lines visible, coat the tip of the steel with a dark permanent marker or layout fluid — Dykem is the common commercial option. Let it dry fully. The dark background makes the shiny metal underneath immediately visible the moment you scratch through it.
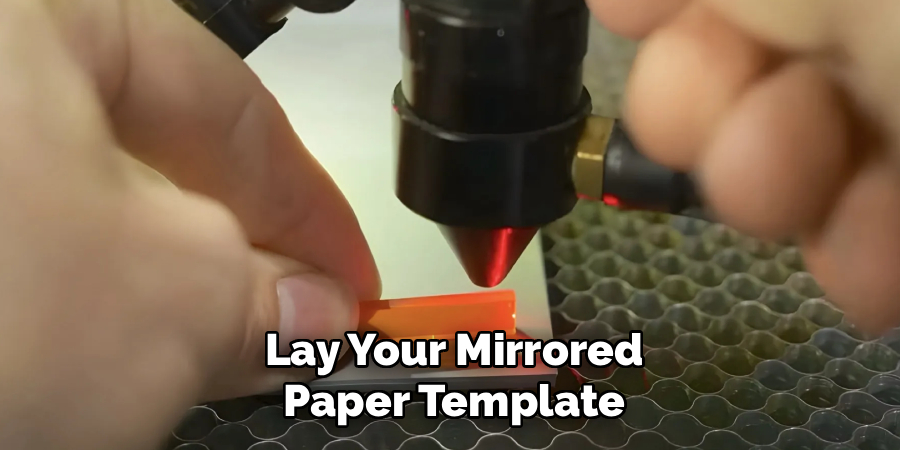
Lay your mirrored paper template over the coated surface and trace the lines using a sharp steel scribe or a hardened center punch. Press firmly enough to cut through the dried ink and leave a clear line in the metal. Work slowly here. A crisp, accurate layout functions as your guide through the entire carving phase, and vague or incomplete lines make it easy to remove metal you meant to keep.
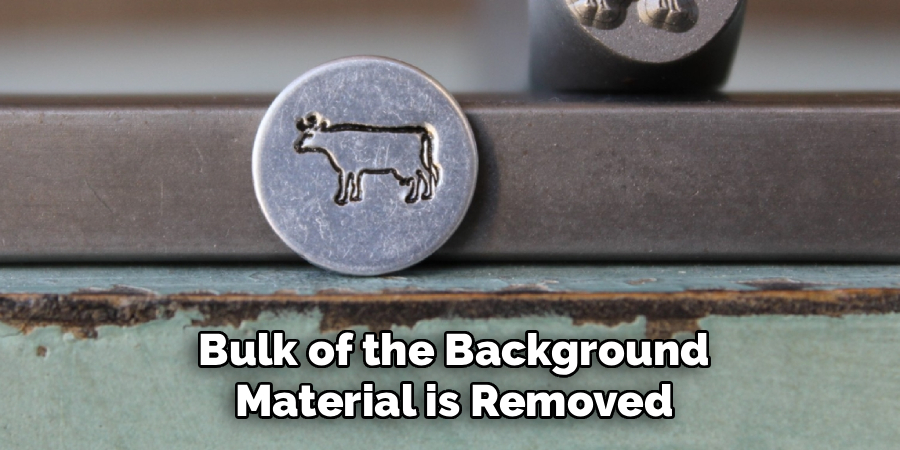
Step 4: Carving and Filing the Negative Space
This is the most time-consuming part of the build. With the blank secured in the vise, fit the rotary tool with a small diamond or tungsten carbide burr and begin grinding away the metal outside your scribed lines. The goal is to leave the design itself raised and elevated while the surrounding background drops by at least one to two millimeters.
Work in short, controlled passes. The steel heats up during grinding, and pushing through without breaks risks both warping the surface and losing track of where you are. Set the tool down regularly, let the metal cool, and take a close look at your progress. Always grind away from the center of the design — a tool slip toward the elevated artwork can undo a lot of careful work in a fraction of a second.
Step 5: Refining the Edges for Crisp Impressions
Once the bulk of the background material is removed, the design will have reasonably defined edges but will likely look rough in places. Put the rotary tool aside and pick up the needle files. Triangle and square profiles work well for sharpening inner corners; flat files clean up straight edges.
What you’re aiming for here is a slight bevel or taper rising toward the top face of the design rather than a sharp vertical drop-off. A vertical wall tends to chip under hammer impact, whereas a gently sloped base gives the fine lines more structural support. Checking progress by pressing the cold steel into scrap leather or soft clay is worth doing frequently — it shows you exactly how the impression reads at that stage and helps identify any raised spots that need more attention.
Step 6: Hardening the Metal with Heat Treatment
Tool steel in its annealed state is too soft for repeated striking. You have to harden it. Grip the back of the rod with blacksmithing tongs, ignite the blowtorch, and apply heat directly to the carved tip. Heat it evenly until it reaches a bright cherry-red color — at this point, the steel has become non-magnetic, which indicates it’s at the right temperature for quenching.
Once the tip glows that characteristic red, plunge it immediately into the quenching oil and swirl it around to disrupt vapor bubbles and cool the steel as fast as possible. This rapid cooling fixes the carbon structure into a hard crystalline arrangement. Expect smoke and the possibility of a small flare-up when hot steel meets oil. Do this step somewhere fireproof with clear space around you.
Step 7: Tempering the Steel for Durability
Fresh from the quench, the steel is very hard but brittle in a way that could cause the carved tip to shatter under a hammer blow. Tempering addresses this. Start by cleaning off the burnt oil residue and polishing the sides of the tip lightly with fine sandpaper so the bare metal is visible.
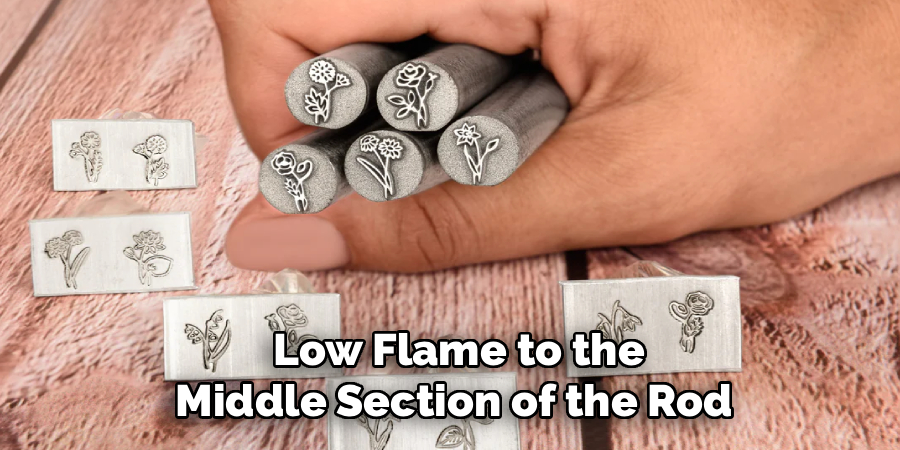
Apply a very gentle, low flame to the middle section of the rod and let the heat travel slowly toward the tip. Watch the color changes in the polished metal: pale yellow gives way to bronze, which shifts toward a dark straw or light brown. The moment the carved tip reaches that bronze or straw color, quench it in water immediately to stop the process. Tempering trades a small amount of hardness for the toughness needed to absorb impact — a necessary exchange if the tool is going to last.
Following these steps on how to make a metal stamp, you can create your own custom stamps that are durable and long-lasting.
Common Mistakes to Avoid
The most frequent problem beginners run into is designing something too detailed for the scale they’re working at. Fine lines and tight curves that look clear on paper can fuse into an unreadable shape once stamped.
The other major error is skipping the tempering step after hardening. It may seem like an optional finish, but an untempered stamp is genuinely fragile — it could crack or shatter on the very first use, which is a poor return on hours of careful carving.
Do You Need To Use Professionals?
For a reasonably straightforward design, this is well within hobbyist territory. That said, there are cases where professional machining makes more sense — particularly when the brief calls for microscopic detail, exacting dimensional tolerances, or a high volume of identical tools.
CNC milling and EDM (electrical discharge machining) services can produce results that hand carving simply can’t replicate at that level. If the design is complex enough that it starts to feel beyond what files and a Dremel can deliver cleanly, that’s a reasonable signal to consult a professional machinist. For most custom logo or initial stamps, though, the DIY route holds up well and teaches skills that carry over into broader metalwork.
How Much Will It Cost?
A single O1 or W1 tool steel blank costs under ten dollars, which keeps the raw material side of things affordable. The larger upfront spend is on equipment — a basic rotary tool, needle files, a bench vise, and a propane torch together could run anywhere from $100 to $200 if you’re starting from nothing.
Once those tools are in the shop, each subsequent stamp costs a little more than the steel rod itself.
Frequently Asked Questions
Q1: What Is The Best Type Of Steel For Making A Metal Stamp?
O1 (oil-hardening) and W1 (water-hardening) tool steel rod stock are the reliable choices. Both alloys carve and file relatively easily in their annealed state, and both contain enough carbon to harden significantly when heated and quenched. Standard mild steel from a hardware store won’t work here — it lacks the carbon content needed to achieve useful hardness.
Q2: Can You Make A Metal Stamp Without Power Tools?
Yes. A quality jeweler’s saw and a thorough set of needle files can remove the negative space without any power equipment, though it takes considerably more time and effort. In some respects, manual filing offers better control over delicate details than a rotary tool, which can remove material faster than intended if attention drifts. The Dremel speeds up bulk removal; the files do the finishing work either way.
Q3: How Deep Should The Design Be Engraved On A Metal Stamp?
For jewelry and leatherwork, a relief depth of roughly 1 to 1.5 millimeters appears to strike the right balance. Too shallow, and the background field makes contact during stamping, leaving an unwanted border around the impression. Too deep, without corresponding structural beveling, and the raised lines become vulnerable to breaking off under load. The 1 to 1.5mm range holds up well across most practical applications.
Ready to Start Stamping
Making your own stamp sits at an interesting intersection between careful craft work and basic metallurgy. Prepare the steel surface properly, carve the design with patience, and follow through on the heat treatment — those three things are really what separate a usable tool from a decorative piece of steel.
Done right, the result is something that can mark your work for years. Get your safety gear on, clamp down the steel, and start carving. Thanks for reading this guide on how to make a metal stamp.
About
Stuart Rich is a distinguished figure in the world of metalworking and fabrication, with a decade of expertise creating innovative and sustainable metal projects. His professional focus lies in merging traditional blacksmithing and machining with modern manufacturing techniques, fostering designs that are both practical and durable. As the author of Metalenify, Stuart Rich delves into the art and science of metallurgy and DIY metal creation, inspiring artisans, hobbyists, and industry professionals alike.
Education
RMIT University
(Melbourne, Australia)
Associate Degree in Engineering Technology (Mechanical / Manufacturing)
Focus on metallurgical properties, industry-driven projects, and practical metal craftsmanship. Gained hands-on experience with traditional machining and digital manufacturing tools, such as CAD, CNC software, and precision welding equipment.
Nottingham Trent University
(United Kingdom)
Bachelor’s in Product Design and Materials Engineering (Honors)
Specialized in product design with a heavy focus on blending creativity with metal production and fabrication techniques. Participated in real-world industry projects, collaborating with architectural and hardware manufacturing companies to optimize material efficiency.
Publications and Impact
In Metalenify, Stuart Rich shares his insights on structural metal design processes, material grades, and strategies for efficient shop production. His writing bridges the gap between raw artisan knowledge and modern industrial needs, making it a must-read for both budding DIY metalworkers and seasoned fabrication professionals.


