Quick answer: To drill through metal with a hand drill, you need the right tools—specifically a titanium or cobalt drill bit, cutting fluid, and appropriate safety gear. Mark your spot with a center punch, secure the metal tightly with clamps, apply cutting fluid to reduce friction, and drill slowly using steady pressure to avoid overheating the bit.
Drilling through solid metal intimidates a lot of DIYers, and honestly, that reaction makes sense. Metal doesn’t forgive mistakes the way wood does. A misplaced hole, an overheated bit, or an unsecured workpiece can ruin your materials, damage your tools, or put you in the emergency room. But with the right setup, the process becomes far less dramatic—and the results speak for themselves.
This guide walks you through exactly how to drill through metal with a hand drill. Whether you’re fixing a gate hinge, fabricating a bracket, or working on an automotive repair, the same core principles apply. Here’s what you’ll take away:
- Which drill bits actually work on metal (and why your wood bits won’t cut it)
- How to prep your workspace and mark your hole with precision
- Why cutting fluid matters more than most beginners expect
- How to recognize the difference between a clean cut and a damaged bit
What Tools and Materials Do You Need to Drill Metal?
Before you touch the trigger, gather the right equipment. Skipping this step is how people end up burning through three drill bits on a job that should have taken one.
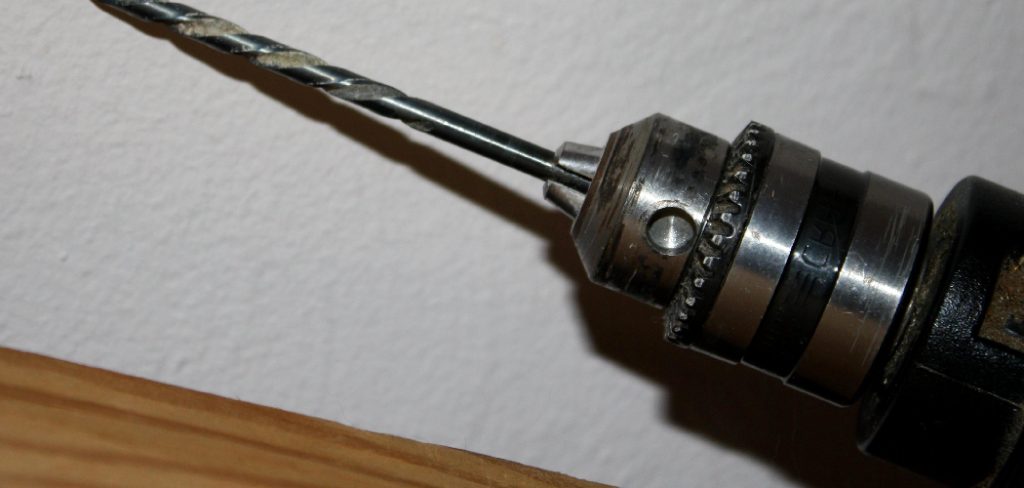
You’ll need a hand drill with variable speed control—this is non-negotiable, since metal cutting tends to require significantly lower RPMs than woodworking. As for bits, standard steel bits dull almost immediately against anything harder than aluminum. Titanium-coated HSS bits handle softer metals reasonably well. For hardened steel or stainless, cobalt drill bits are the better call; they’re formulated to hold their edge at the elevated temperatures that metal drilling generates.
Beyond the drill and bits, you’ll want:
- A center punch and hammer (to dimple the surface before drilling)
- Cutting fluid or machine oil (not WD-40—a proper cutting lubricant)
- Two or more heavy-duty C-clamps or bar clamps
- A deburring tool or half-round metal file
- Safety glasses rated for high-impact use and leather work gloves
7 Simple Step-By-Step Guidelines on How to Drill Through Metal With a Hand Drill
Step 1: Gather Your Protective Gear and Prepare the Workspace
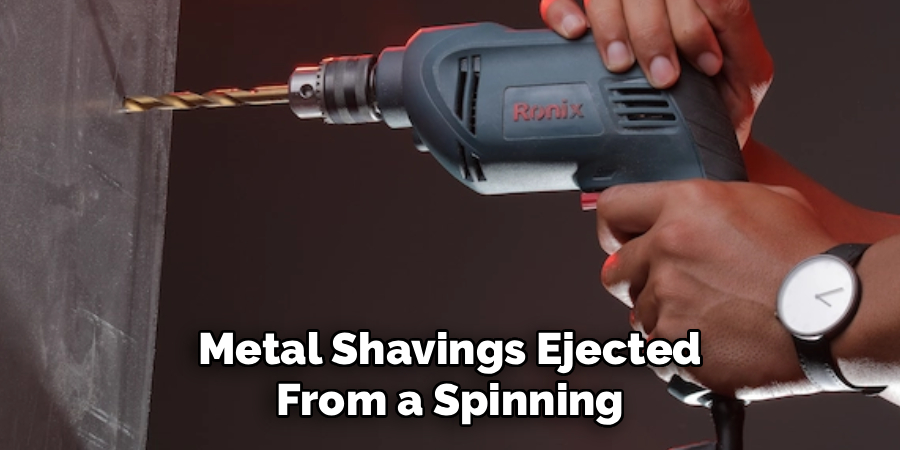
Safety here isn’t a formality. Metal shavings ejected from a spinning bit are sharp enough to embed themselves in skin or, far worse, the eye. Wrap-around safety glasses—not the flimsy flat kind—are worth the investment. Pair those with thick leather gloves, and check that your sleeves are fitted. Loose fabric near a rotating chuck can catch faster than you’d expect.
Your workspace deserves the same attention. Clear the bench of anything flammable, since cutting fluid can smolder when it contacts a very hot bit. Good overhead lighting directly on the work area lets you watch for smoke, monitor shaving patterns, and catch any drift in the bit’s path. Keep your cutting fluid and center punch within arm’s reach so you’re not stepping away mid-process.
Step 2: Measure and Mark the Exact Drilling Location
Metal doesn’t let you backfill a bad hole. A misaligned hole in steel is a permanent problem, so taking an extra minute to verify your measurements pays off considerably.
Use a steel ruler or machinist’s square to locate the exact point, and measure from at least two reference edges to confirm the intersection. A permanent fine-tip marker works for quick jobs, but on polished or reflective metal, the mark may shift or disappear under cutting fluid. A metal scribe—essentially a carbide-tipped marking tool—scratches a clean, visible line directly into the surface. Some machinists apply a thin coat of layout fluid (Dykem Blue is a common option) to create a high-contrast background that stays visible even when oil spreads across the surface.
Step 3: Create a Dimple Using a Center Punch and Hammer
This step tends to get skipped by beginners, and it’s almost always the reason their first hole ends up slightly off-center.
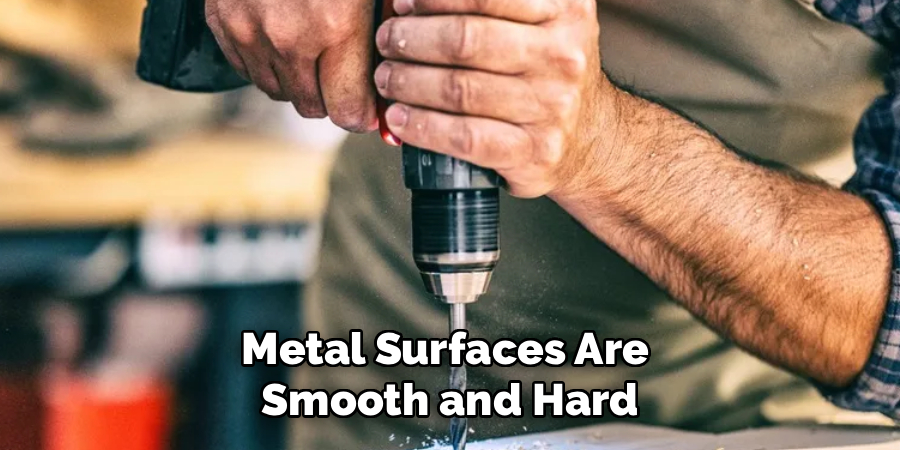
Metal surfaces are smooth and hard. A drill bit placed flat against that surface has nothing to guide it—the tip will skate sideways the moment it starts spinning, a phenomenon machinists call “walking.” Place the tip of your center punch directly on your mark and hold it perpendicular to the surface. One firm, decisive hammer strike creates a small conical crater. That crater gives the drill bit a seat to rest in before the cutting edges engage, eliminating the walking problem almost entirely.
If the dimple looks shallow after the first strike, hit it again. A shallow dimple may not hold the bit on harder metals.
Step 4: Secure the Metal Piece Firmly With Clamps
Holding metal down with your hand while drilling is not a reasonable substitute for clamps. As the bit approaches breakthrough—when it’s about to push through the far side of the material—it can catch aggressively, causing the workpiece to spin with enough torque to cause a serious laceration.
Place the metal on a sacrificial scrap of wood, then clamp both the metal and the wood to the workbench edge using at least two C-clamps. The wood serves two purposes: it gives the bit somewhere safe to go after breakthrough, and it protects the bench surface. Once clamped, physically try to wobble the metal. If there’s any give, tighten further or add a third clamp. With the workpiece secured, both hands go on the drill—one on the trigger handle, one providing downward pressure—which gives you far more control over the cut.
Step 5: Apply Cutting Fluid to the Drilling Area

Friction between a steel bit and a steel workpiece generates heat fast. Left unmanaged, that heat can destroy a drill bit’s temper—the heat treatment that keeps the steel hard—within seconds of contact. Once that happens, the bit is effectively useless.
Apply a few drops of cutting fluid directly into the center punch dimple before the bit touches the metal. As you drill, the fluid will smoke and evaporate. Stop periodically, brush away accumulated shavings with a stiff brush (never your fingers), and add more oil. This rhythm—drill, stop, clear, reapply—may feel slow, but it extends bit life considerably and produces a cleaner hole than trying to power through in one go.
Step 6: Begin Drilling Slowly With Firm and Steady Pressure
Seat the bit in the dimple before engaging the motor. Once positioned, grip with both hands and pull the trigger at the lowest practical speed. The correct cutting action produces curly, ribbon-like metal shavings. If you’re seeing fine metallic dust instead, the speed is likely too high relative to the pressure you’re applying—try slowing down and leaning in more deliberately.
Speed is the variable most beginners get wrong. More RPMs do not mean faster cutting in metal; it typically means more heat and less material removal. A slow, deliberate rotation with consistent downward force allows the cutting edges to shear through the material rather than just burnish the surface.
As the bit nears breakthrough, ease off the downward pressure slightly. The final few millimeters tend to grab, and a controlled exit leaves a cleaner hole while preventing the sudden jerk that can strain your wrists.
Step 7: Deburr the Edges to Create a Smooth Finish
Once the bit clears the metal, keep it spinning slowly as you withdraw it—this helps carry shavings out of the hole rather than packing them in. Then power down, set the drill aside, and unclamp the workpiece.
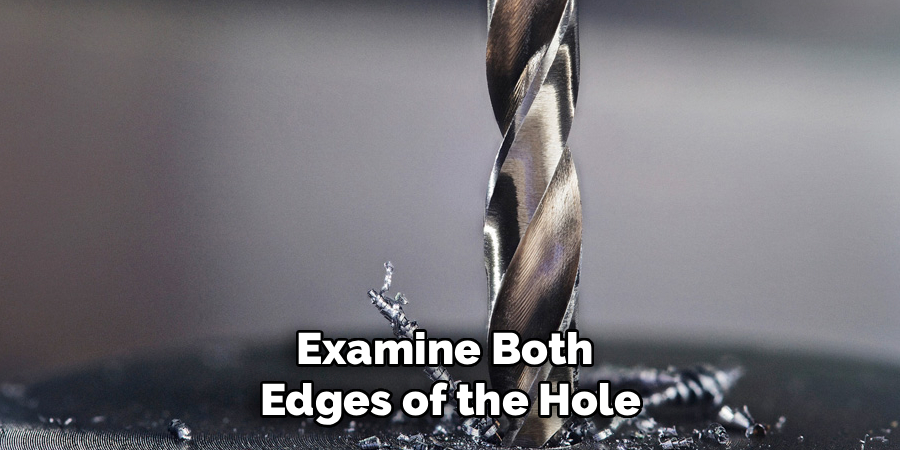
Examine both edges of the hole. The exit side almost always has burrs—sharp raised ridges of displaced metal that protrude from the surface. These aren’t cosmetic issues; they’ll prevent fasteners from seating flush and can cut through anything that contacts them. Run a deburring tool, a countersink bit, or a half-round file around the circumference of the hole on both faces, applying light even pressure until the edge feels smooth through a gloved hand. This last step is what separates a professional-looking result from a rough one.
Following these steps on how to drill through metal with a hand drill will not only give you a smooth and clean hole but also ensure the safety of both yourself and your project.
Safety Precautions
Metalwork may require more consistent caution than most shop tasks. Before each session, inspect your drill’s cord and housing for damage—a frayed cord near a metal workpiece is a shock hazard. Check every bit before use; a chipped cutting edge tends to slip or shatter under load rather than cut cleanly.
Keep your face to the side of the drill motor’s cooling vents, which can pull in hair or debris. If the bit catches and the drill stalls, release the trigger immediately rather than fighting the torque—holding on through a stall risks a twisted wrist or a burned motor. And always clear shavings with a brush or rag, not your bare hands. The edges are sharper than they look.
Common Mistakes to Avoid
Running the drill at high speed is the most common error, and it tends to be expensive in terms of ruined bits. Skipping cutting fluid is a close second—it seems optional until the bit turns blue from heat and stops cutting entirely.
Failing to clamp the workpiece often ends in a frightening spin-out, even on relatively small pieces of stock. Skipping the center punch step produces wandering holes that are difficult or impossible to correct after the fact. Finally, applying uneven or angled pressure on smaller bits—anything under 3mm or so—may snap them cleanly in half.
Frequently Asked Questions
Q1: What Type Of Drill Bit Is Best For Metal?
Standard wood bits or masonry bits won’t cut metal effectively. For soft metals like aluminum or thin mild steel, high-speed steel (HSS) bits are usually sufficient. For harder materials—stainless steel, tool steel, hardened fasteners—titanium-coated or cobalt bits hold up considerably better under the heat and friction involved. Cobalt bits, in particular, appear to maintain their edge longer than titanium-coated options on repeated heavy cuts.
Q2: Why Does My Drill Bit Keep Getting Hot?
Some heat is unavoidable in metal drilling; it’s a natural result of friction. Excessive heat, though, usually points to one of two problems: the drill speed is too high, or you’re not applying enough downward pressure to allow the cutting edges to actually bite. Cutting fluid, a slower RPM, and frequent pauses to let the bit cool should bring the temperature down to a manageable range.
Q3: Can I Use A Regular Wood Drill Bit On Metal Surfaces?
No. Brad-point bits and spade bits are designed with cutting geometry suited to wood fiber, not metal. Against steel or even aluminum, they’ll dull almost immediately, and there’s a real risk they’ll warp or snap under the resistance. A titanium or cobalt bit rated for metalworking is the appropriate substitution—there’s no practical workaround here.
Take Your Metalworking Projects to the Next Level
Knowing how to drill through metal with a hand drill shifts a whole category of repairs and fabrication work from “intimidating” to “manageable.” The fundamentals aren’t complicated: use the right bit for the material, mark and dimple your hole precisely, clamp everything down, keep the bit lubricated, and drill slowly with consistent pressure. Each step builds on the last, and cutting corners on any one of them tends to show up in the finished hole.
Start with a scrap piece of the same metal you’ll actually be working with. Practice the punch, the clamping, and the slow drilling rhythm before committing to the real workpiece. Once those habits feel natural, you’ll find the process is far less stressful than the first attempt usually suggests.
About
Stuart Rich is a distinguished figure in the world of metalworking and fabrication, with a decade of expertise creating innovative and sustainable metal projects. His professional focus lies in merging traditional blacksmithing and machining with modern manufacturing techniques, fostering designs that are both practical and durable. As the author of Metalenify, Stuart Rich delves into the art and science of metallurgy and DIY metal creation, inspiring artisans, hobbyists, and industry professionals alike.
Education
RMIT University
(Melbourne, Australia)
Associate Degree in Engineering Technology (Mechanical / Manufacturing)
Focus on metallurgical properties, industry-driven projects, and practical metal craftsmanship. Gained hands-on experience with traditional machining and digital manufacturing tools, such as CAD, CNC software, and precision welding equipment.
Nottingham Trent University
(United Kingdom)
Bachelor’s in Product Design and Materials Engineering (Honors)
Specialized in product design with a heavy focus on blending creativity with metal production and fabrication techniques. Participated in real-world industry projects, collaborating with architectural and hardware manufacturing companies to optimize material efficiency.
Publications and Impact
In Metalenify, Stuart Rich shares his insights on structural metal design processes, material grades, and strategies for efficient shop production. His writing bridges the gap between raw artisan knowledge and modern industrial needs, making it a must-read for both budding DIY metalworkers and seasoned fabrication professionals.


