Quick answer: To fix cast aluminum without welding, you can use specialized aluminum epoxy or brazing rods. Epoxy requires cleaning the surface, mixing a two-part resin, applying it to the crack, and allowing it to cure. Brazing involves heating the aluminum with a propane torch and melting a zinc-aluminum rod into the joint for a strong repair.
A cracked cast aluminum part doesn’t have to mean a trip to the scrap pile. Most people assume TIG welding is the only path forward — and since a quality TIG setup can cost thousands of dollars, that assumption tends to end the project before it starts. Whether you’re looking at a cracked patio chair frame, a split engine bracket, or a broken decorative casting, modern epoxy compounds and low-temperature brazing techniques may offer a genuinely workable fix using materials you can pick up at any hardware store for under $50.
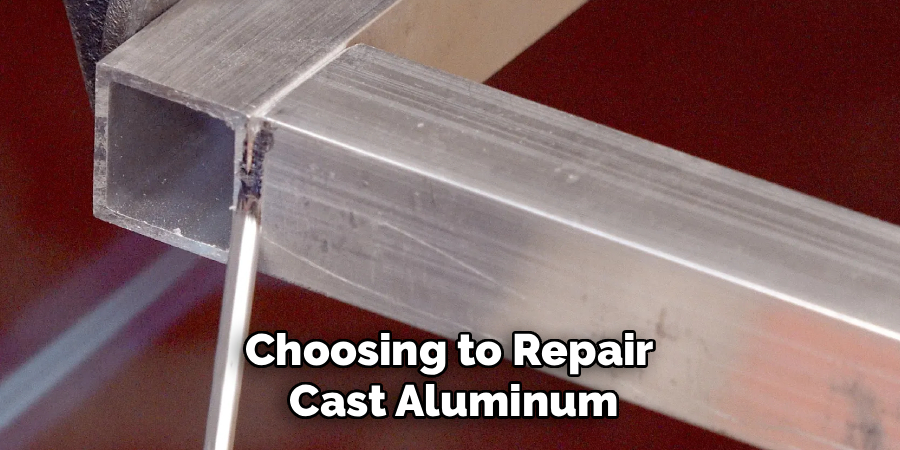
This guide walks you through exactly how to fix cast aluminum without welding — from surface prep to the final finish pass.
Tools and Materials You’ll Need
Before starting your repair project, gather the necessary supplies to ensure a smooth and efficient process.
- Two-part aluminum-reinforced epoxy (such as J-B Weld) or aluminum brazing rods
- A propane or MAP gas torch (if using brazing rods)
- Stainless steel wire brush
- Medium-grit sandpaper (80 to 120 grit)
- Acetone or a specialized degreasing solvent
- Safety glasses and heavy-duty work gloves
- Putty knife or applicator stick for spreading epoxy
7 Simple Step-by-step Guidelines on How to Fix Cast Aluminum Without Welding
Step 1: Clean and Prepare the Surface
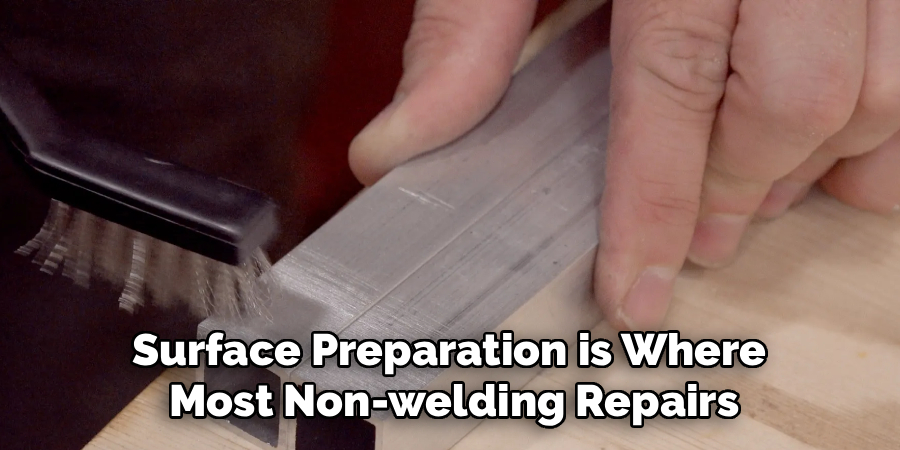
Surface preparation is where most non-welding repairs either succeed or quietly fail. Cast aluminum is naturally porous, meaning oil, dirt, and oxidation work their way deep into the metal over time — not just sitting on top of it. Wipe the entire repair area with a clean rag soaked in acetone or a heavy-duty degreaser, and don’t be timid about it. Any grease left behind will break the adhesive bond before it ever has a chance to form.
Once the surface is oil-free, you still have one more enemy to deal with: aluminum oxide. This thin, invisible layer forms almost instantly when aluminum is exposed to air, and it’s slick enough to prevent proper adhesion. Scrub the metal with a stainless steel wire brush until it looks bright and almost silvery. Skip the carbon steel brushes — they shed microscopic iron particles into the soft aluminum surface, which can cause rust and corrosion problems down the line.
Step 2: Roughen the Repair Area
Even the strongest epoxy needs something to grab onto. Sand the area surrounding the crack aggressively with medium-grit paper — you’re not trying to polish it, you’re trying to score it. The goal is a surface covered in fine scratches and grooves that the repair material can mechanically lock into.
For deep or severe cracks, take a rotary tool or small file and carve a shallow V-shaped groove directly into the fissure before you apply anything. Beveling the crack edges widens the contact surface and gives the repair material significantly more material to grip. It’s a small extra step that meaningfully improves how well the finished repair holds under stress.
Step 3: Mix the Aluminum Epoxy
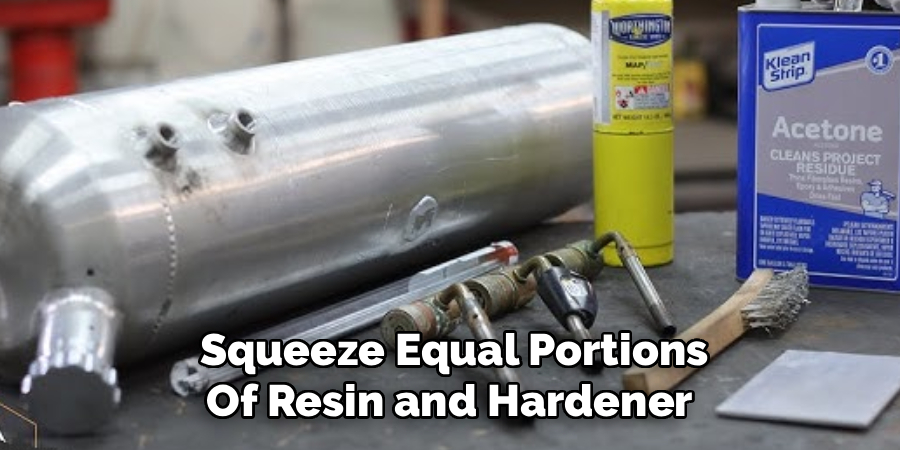
Two-part epoxies are straightforward, but the mixing stage is one worth taking seriously. Squeeze equal portions of resin and hardener onto a disposable piece of cardboard or plastic — the manufacturer’s ratio matters here, so follow it. Cold conditions can slow the cure time considerably and produce a weaker final bond, so work at room temperature when you can.
Blend the two components with a wooden stick or plastic putty knife until the color is completely uniform with no visible streaks. Once mixed, most aluminum epoxies give you roughly 20 to 30 minutes of working time before the material begins to set. That window goes faster than it sounds, so have everything staged before you start mixing.
Step 4: Apply the Repair Material
Press the mixed epoxy firmly into the crack or V-groove with your applicator stick, working it down into the void to push out any trapped air pockets. Air bubbles create weak spots — small ones that may not matter initially but tend to fail under load or thermal cycling over time. Smooth the top of the epoxy across the roughened area on both sides of the crack to form a bridging layer, not just a surface fill.
If you’re rebuilding a broken tab or filling a larger void, build the epoxy up in thin layers rather than trying to glob it all on at once. Shape it as close to the final contour as you can while it’s still pliable. A few minutes spent getting the profile right now will spare you considerably more time sanding later.
Step 5: Execute the Brazing Process (Alternative Method)
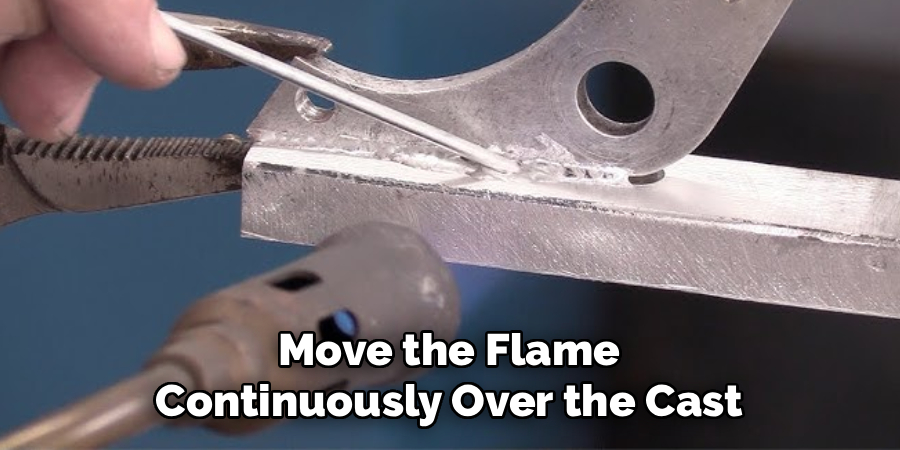
If you require a stronger repair and choose to use brazing rods instead of epoxy, you must heat the base metal with your propane torch. Move the flame continuously over the cast aluminum around the crack rather than holding it in one spot — cast aluminum melts at around 1,220°F (660°C), and the brazing rod is designed to flow at around 730°F (387°C). That gap is your working window, and it’s narrower than it seems.
Touch the brazing rod to the heated metal surface periodically — not to the flame itself. When the base metal reaches the right temperature, the rod will melt on contact and flow into the crack through capillary action. Keep feeding the rod until the joint is filled, then set it aside and let it air-cool completely. Quenching it in water might feel efficient, but thermal shock can crack the metal right next to your repair.
Step 6: Cure and Harden the Repair
Epoxy repairs need time, and that’s the one thing most people aren’t willing to give them. Leave the part undisturbed in a dry, ventilated area for at least 15 to 24 hours. Most quality metal epoxies reach their rated tensile strength — often around 5,000 PSI — only after a full cure cycle. Moving, stressing, or machining the part before that window closes is the most reliable way to ruin an otherwise solid repair.
Brazed repairs are simpler: just let the casting return to ambient room temperature on a fireproof surface before handling it. An hour is usually enough. Rushing it with compressed air or water risks the same thermal shock problem mentioned above.
Step 7: Sand and Finish the Surface
Once the repair material is fully cured or cooled, you can begin the process of restoring the part’s original appearance. Start with coarse sandpaper or a fine metal file to knock down any high spots, blending the patch gradually into the surrounding surface. Work slowly — it’s easy to remove too much material here if you’re not paying attention.
Move through progressively finer grits until the repair area matches the surrounding texture. From there, a coat of aluminum-compatible primer and paint will hide the fix entirely. Following these steps on how to fix cast aluminum without welding gives you a durable, lasting restoration — not a temporary patch.
Common Mistakes to Avoid
Inadequate cleaning is the single most common reason these repairs fail. It’s also the easiest mistake to make, because the surface can look clean while still carrying enough residual oil or oxide to compromise adhesion.
Beyond that, people frequently make the error of directing the torch flame at the brazing rod itself rather than the base metal — this causes the rod to ball up and bead off instead of flowing into the joint. Rushing the epoxy cure is the third common misstep: a gummy, under-cured bond may hold under light handling, but it tends to give out under any meaningful stress.
Do You Need To Use Professionals?
While fixing cast aluminum without welding is highly accessible for most DIY enthusiasts, certain situations do warrant professional intervention. If the broken part is a critical structural component of an automobile — an engine block, a suspension mount, or anything load-bearing under dynamic stress — a certified TIG welder is the appropriate call.
For decorative pieces, brackets, furniture frames, and non-structural housings, the methods described here appear to be more than adequate for most home repair scenarios. The key question to ask is how much cyclic or impact stress the repaired section will realistically experience.
How Much Will It Cost?
Choosing to repair cast aluminum at home is considerably more cost-effective than paying shop rates for specialty welding work. A quality two-part aluminum epoxy typically runs $7 to $15 at most hardware stores.
If you go the brazing route, a pack of aluminum brazing rods costs roughly $15 to $20, and a basic propane torch kit adds another $20 to $30. All in, you can complete a permanent repair for under $50 — compared to replacement costs or professional labor that can run several times that figure.
Frequently Asked Questions
Q1: What Is The Strongest Epoxy For Cast Aluminum Repair?
The strongest epoxies for cast aluminum are two-part resins specifically reinforced with steel or aluminum particulates. Brands like J-B Weld Original Cold-Weld Formula provide a tensile strength of over 5,000 PSI and can withstand temperatures up to 500°F. Always verify the manufacturer’s specifications to confirm the product suits your specific strength and temperature requirements before committing.
Q2: Can I Use A Soldering Iron To Fix Cast Aluminum?
A standard electronics soldering iron won’t work here — it simply doesn’t generate enough heat. Cast aluminum acts as a significant heat sink, drawing thermal energy away from the repair zone almost as fast as the iron can deliver it. You need a propane or MAP gas torch to raise the surrounding metal to the temperature where brazing rods will actually flow.
Q3: How Do You Prepare Cast Aluminum Before Applying Epoxy?
Start by removing all surface contaminants with a strong solvent like acetone. Follow that with aggressive scrubbing using a stainless steel wire brush to eliminate the aluminum oxide layer, which is invisible but present on virtually all exposed aluminum. Finally, sand the area with medium-grit paper to create the mechanical texture the epoxy needs to grip.
Next Steps for Your Aluminum Repair Project
Repairing cracked or broken cast aluminum doesn’t require a background in metallurgy or access to expensive fabrication tools. With proper surface prep and the right choice between high-strength epoxy and low-temperature brazing, you can restore most broken aluminum pieces to functional condition at home. Thanks for reading this guide on how to fix cast aluminum without welding.
About
Stuart Rich is a distinguished figure in the world of metalworking and fabrication, with a decade of expertise creating innovative and sustainable metal projects. His professional focus lies in merging traditional blacksmithing and machining with modern manufacturing techniques, fostering designs that are both practical and durable. As the author of Metalenify, Stuart Rich delves into the art and science of metallurgy and DIY metal creation, inspiring artisans, hobbyists, and industry professionals alike.
Education
RMIT University
(Melbourne, Australia)
Associate Degree in Engineering Technology (Mechanical / Manufacturing)
Focus on metallurgical properties, industry-driven projects, and practical metal craftsmanship. Gained hands-on experience with traditional machining and digital manufacturing tools, such as CAD, CNC software, and precision welding equipment.
Nottingham Trent University
(United Kingdom)
Bachelor’s in Product Design and Materials Engineering (Honors)
Specialized in product design with a heavy focus on blending creativity with metal production and fabrication techniques. Participated in real-world industry projects, collaborating with architectural and hardware manufacturing companies to optimize material efficiency.
Publications and Impact
In Metalenify, Stuart Rich shares his insights on structural metal design processes, material grades, and strategies for efficient shop production. His writing bridges the gap between raw artisan knowledge and modern industrial needs, making it a must-read for both budding DIY metalworkers and seasoned fabrication professionals.


