
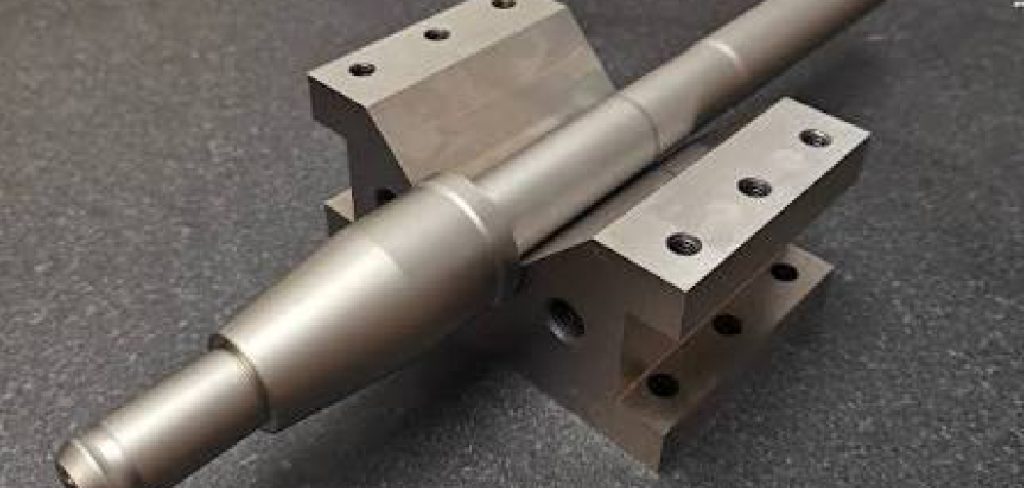
A2 steel is one of the most trusted tool steels around. Knife makers, machinists, and hobbyists love it for a simple reason: it holds an edge well, resists wear, and stays tough under pressure. But raw A2 steel doesn’t reach its full potential straight out of the box. To unlock its real strength, you need to heat treat it properly.
Heat treating sounds intimidating if you’ve never done it. The good news? With the right tools, a little patience, and clear instructions, you can do it yourself.
This guide on how to heat treat a2 steel walks you through everything from start to finish. We’ll cover the benefits, the gear you’ll need, ten easy steps, common mistakes, and answers to the questions most people ask.
What Are the Benefits?
Heat treating A2 steel isn’t just an extra step. It’s the process that transforms soft, workable metal into a hard, durable tool. Here’s what you gain when you do it right.
- Better hardness. Properly heat-treated A2 steel reaches a hardness of around 58–62 HRC. That means your blade or tool keeps its edge far longer than untreated steel.
- Excellent wear resistance. A2 is an air-hardening steel, and its chromium content gives it great abrasion resistance. Your tools last longer and need less sharpening.
- Improved toughness. A2 strikes a smart balance. After tempering, it resists chipping and cracking better than many high-carbon steels. That makes it perfect for tools that take a beating.
- Dimensional stability. Because A2 hardens in air rather than in liquid, it warps less during the process. Your finished piece stays closer to the shape you started with.
- Reliability you can count on. Once treated correctly, A2 performs consistently. Whether you’re making a kitchen knife or a punch die, you’ll know exactly what to expect from it.
In short, heat treating turns A2 from a promising material into a high-performing tool. That’s worth the effort.
What Will You Need?
Before you start, gather your equipment. Working with hot steel is no place for improvising halfway through. Here’s your checklist.
- A heat-treating oven or kiln capable of reaching at least 1,800°F (982°C). Precise temperature control matters a lot with A2.
- A digital thermometer or built-in pyrometer to confirm your oven’s true temperature.
- Stainless steel foil for wrapping the steel and protecting it from scaling and decarburization.
- Heat-resistant gloves rated for high temperatures.
- Long metal tongs for safely handling hot steel.
- A safety face shield and apron to protect against heat and stray sparks.
- A toaster oven or tempering oven that holds steady temperatures between 300°F and 500°F.
- A flat heat-resistant surface or steel plates for cooling and plate quenching.
- A timer to track soak and temper times accurately.
- A hardness tester (optional but helpful) to check your results.
- Good ventilation or a fume extractor, since heat treating can release fumes.
Having everything ready before you fire up the oven keeps the process smooth and safe.
10 Easy Steps on How to Heat Treat A2 Steel
Follow these steps in order. Take your time and never rush a stage, especially the heating and cooling parts.
Step 1: Prepare Your Workspace
Start by clearing your area of anything flammable. You’ll be dealing with extreme heat, so safety comes first. Set up your oven, lay out your tools, and put on your gloves, apron, and face shield. Make sure the room has proper ventilation. A clean, organized space helps you avoid accidents and keeps your focus where it belongs.
Step 2: Inspect and Clean the Steel
Wipe down your A2 steel to remove oil, grease, and fingerprints. Any contaminants can affect the surface during heating. Check the piece for cracks or flaws too. It’s much easier to spot problems now than after you’ve put hours into the process. A clean, sound piece of steel gives you the best chance at a flawless result.
Step 3: Wrap the Steel in Stainless Foil
Cut a piece of stainless steel foil large enough to fully wrap your workpiece. Fold the edges tightly to create a sealed pouch. This protects the steel from oxygen, which prevents scaling and decarburization at high heat. Leave no large gaps. A snug wrap keeps the surface clean and ready for finishing later.
Step 4: Preheat the Oven
Set your oven to a preheat temperature of around 1,200°F to 1,400°F (650°C–760°C). Preheating helps the steel warm evenly and reduces internal stress. Skipping this step risks uneven heating and warping. Let the oven stabilize at the target before moving on. Patience here pays off down the line.
Step 5: Heat to Austenitizing Temperature
Raise the oven temperature to 1,775°F (968°C). This is the austenitizing range for A2 steel, where the internal structure changes and prepares for hardening. Use your pyrometer to confirm the oven hits this point accurately. Even a small error in temperature affects your final hardness, so precision matters.
Step 6: Soak the Steel
Once the oven reaches temperature, hold the steel there. The general rule is about 20 to 30 minutes per inch of thickness. The general rule is about 20 a uniform temperature all the way through. Don’t cut it short. A proper soak ensures consistent hardness from edge to core.
Step 7: Air Quench the Steel
A2 is an air-hardening steel, which makes this step refreshingly simple. Remove the wrapped steel from the oven with your tongs and place it on a flat heat-resistant surface. Let it cool in still air, or use steel plates to speed cooling and reduce warping. Avoid water or oil quenching, since A2 doesn’t need it and rapid liquid quenching can cause cracks.
Step 8: Let It Cool Completely
Allow the steel to cool down to room temperature before handling it directly. This usually takes a while, so resist the urge to rush. Once cool, the steel will be very hard but also brittle. It needs tempering before it’s ready for real use. Test the hardness now if you have a tester.
Step 9: Temper the Steel
Tempering reduces brittleness while keeping most of the hardness. Set your tempering oven between 350°F and 500°F (175°C–260°C), depending on the hardness you want. Lower temperatures keep more hardness; higher temperatures add toughness. Hold the steel at temperature for two hours. This step is essential, so never skip it.
Step 10: Double Temper and Finish
For the best results, repeat the tempering cycle a second time after the steel cools. Double tempering stabilizes the internal structure and improves toughness. Once finished, let the steel cool fully, then remove any remaining foil. Now you can clean, sharpen, and finish your piece. Your A2 steel is ready to perform.
5 Things You Should Avoid
Even careful makers run into trouble. Watch out for these common mistakes.
1. Skipping the preheat stage. Jumping straight to high heat shocks the steel and increases the risk of warping or cracking. Always preheat first.
2. Guessing the temperature. A2 is sensitive to heat. Relying on color alone instead of a calibrated pyrometer leads to inconsistent results. Trust your instruments.
3. Quenching in water or oil. A2 hardens in air. Forcing a liquid quench can crack your steel. Let it cool naturally.
4. Forgetting to temper. Hardened-but-untempered steel is dangerously brittle. It may shatter under stress. Tempering is non-negotiable.
5. Ignoring safety gear. Hot steel and high temperatures cause serious burns. Never work without gloves, a face shield, and proper ventilation.
Avoid these, and you’ll dodge the most common heat-treating headaches.
Frequently Asked Questions
- Why Does A2 Steel Harden in Air Instead of Needing Oil or Water?
A2 contains chromium and other alloying elements that slow its cooling reaction. This lets the steel harden as it cools in still air. Because there’s no rapid liquid quench, A2 warps and cracks far less than many other steels. That’s one of the main reasons makers love it. It’s forgiving and stable during the hardening stage. - What Hardness Should I Expect After Heat Treating A2?
After proper hardening and tempering, A2 typically reaches between 58 and 62 HRC. The exact number depends on your tempering temperature. Lower tempering temperatures keep the steel harder, while higher ones trade some hardness for added toughness. For most knives and tools, the 58–60 HRC range offers a great balance. A hardness tester confirms your results. - Can I Heat Treat A2 Steel Without a Proper Oven?
It’s strongly discouraged. A2 requires precise, stable temperatures to harden correctly, and a forge or torch makes that very hard to control. Without accurate temperatures, you risk uneven hardness, warping, or a ruined piece. A dedicated heat-treating oven with a pyrometer gives you the consistency you need. If you’re serious about results, invest in the right equipment.
Conclusion
Heat treating A2 steel might look complex at first, but it really comes down to following a clear sequence carefully. Prepare your workspace, clean and wrap your steel, then heat, soak, and air quench it. Finish strong with proper tempering, and you’ll end up with a hard, tough, reliable tool.
The secret to success isn’t fancy gear or years of experience. It’s patience and precision. Take each step seriously, respect the heat, and never skip the safety basics. Avoid the common mistakes we covered, and check your hardness when you’re done.
Hopefully, the article on how to heat treat a2 steel has given you a solid understanding of the process and its importance. Remember to always follow the manufacturer’s recommendations for heat treating specific types of steel, as each may have its own unique properties and requirements.

About
Stuart Rich is a distinguished figure in the world of metalworking and fabrication, with a decade of expertise creating innovative and sustainable metal projects. His professional focus lies in merging traditional blacksmithing and machining with modern manufacturing techniques, fostering designs that are both practical and durable. As the author of Metalenify, Stuart Rich delves into the art and science of metallurgy and DIY metal creation, inspiring artisans, hobbyists, and industry professionals alike.
Education
RMIT University
(Melbourne, Australia)
Associate Degree in Engineering Technology (Mechanical / Manufacturing)
Focus on metallurgical properties, industry-driven projects, and practical metal craftsmanship. Gained hands-on experience with traditional machining and digital manufacturing tools, such as CAD, CNC software, and precision welding equipment.
Nottingham Trent University
(United Kingdom)
Bachelor’s in Product Design and Materials Engineering (Honors)
Specialized in product design with a heavy focus on blending creativity with metal production and fabrication techniques. Participated in real-world industry projects, collaborating with architectural and hardware manufacturing companies to optimize material efficiency.
Publications and Impact
In Metalenify, Stuart Rich shares his insights on structural metal design processes, material grades, and strategies for efficient shop production. His writing bridges the gap between raw artisan knowledge and modern industrial needs, making it a must-read for both budding DIY metalworkers and seasoned fabrication professionals.





