
You finish a craft project or a quick repair, step back to admire the work, and then you see them. Stubborn blobs of dried hot glue stuck fast to a metal surface, looking like they’ve been welded on. Hot glue grips with surprising stubbornness, and at first glance, it can seem impossible to peel away without scratching the finish underneath.
The reassuring part is that learning how to remove glue gun glue from metal is more straightforward than those hardened lumps suggest. Once you understand how the adhesive actually bonds and which gentle methods break that bond, the rest falls into place.
This guide covers why hot glue clings to metal, the safe supplies that loosen it, a clear step-by-step process, and how to adapt your approach for delicate or painted surfaces. Most of what you need is probably sitting in a drawer or under your sink right now.
Why Hot Glue Sticks to Metal
Before you start prying at it, it helps to understand what you’re up against. Hot glue doesn’t bond the way many people assume, and that distinction points you straight toward the easiest fix.
How Hot Glue Forms a Bond
Hot glue works through a mechanical grip rather than a chemical one. When the adhesive is melted, it flows into the tiny pits, scratches, and imperfections on a surface, then hardens in place.
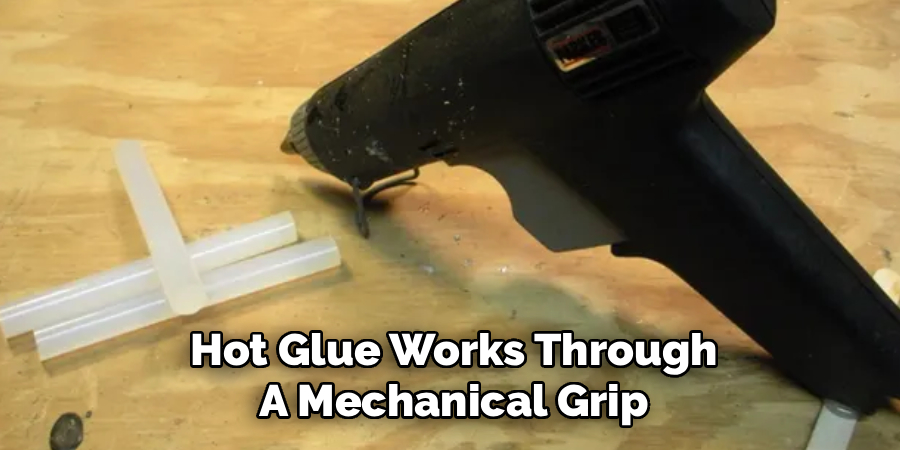
Once it cools, the glue is essentially anchored into those microscopic nooks. It’s holding on by physically locking into the surface, not by fusing with the metal itself. That’s good news, since a mechanical grip is far easier to break than a true chemical bond.
Why Smooth Metal Releases Differently
This is where metal often works in your favor. A smooth, nonporous surface gives hot glue fewer imperfections to grab onto, so the adhesive tends to peel away more cleanly than it would from wood or fabric.
Rough or textured metal is a different story. The more pits and grooves available, the deeper the glue settles in, which makes it cling harder. Still, even on textured surfaces, the bond is rarely as permanent as it looks.
How Heat and Cold Affect the Bond
Temperature is your best ally here, and it cuts both ways. Warming the glue softens it back toward its pliable state, loosening that mechanical grip so it lifts more easily.
Cold does the opposite, and it’s just as useful. Chilling hot glue makes it hard and brittle, which can cause it to crack and snap off with light pressure. Knowing when to reach for heat and when to reach for cold is half the battle.
What You Need to Remove Hot Glue
You don’t need anything specialized to tackle most glue messes. A handful of common, affordable items handle nearly every situation without harming the metal.
Heat Sources That Soften Glue
A hair dryer is the gentlest and most accessible option, and it’s usually all you’ll need. A heat gun on a low setting works faster, though it demands more care since it gets considerably hotter.
A warm, damp cloth can also do the job for small spots. The goal with any of these is to soften the glue at its edges, not to melt it into a runny mess.
Cold Methods That Harden Glue
When heat isn’t doing the trick, cold often will. Ice cubes sealed in a plastic bag let you chill a glue blob right where it sits without leaving water everywhere.
For smaller items, the freezer is even simpler. Pop the piece in for fifteen or twenty minutes, and the glue may turn brittle enough to snap off with a fingernail or a gentle nudge.
Solvents and Gentle Scrapers
For the sticky residue that often lingers after peeling, solvents step in. Rubbing alcohol is the mild, everyday choice, while acetone handles tougher remnants on bare metal.
You’ll also want a plastic scraper or even an old credit card. A plastic edge lifts glue without gouging the surface, which is exactly what you don’t get from a metal blade.
Preparing the Surface Before You Start
A minute of preparation makes the whole job faster and protects the finish from accidental harm. It’s tempting to dive straight in, but these small checks pay off.
Identifying the Type of Metal
Take a moment to figure out what you’re working with. Bare metal, coated metal, and painted metal each respond a little differently, and the difference matters most when solvents enter the picture.
A bare stainless steel or aluminum can usually handle stronger treatment. Painted or coated surfaces, on the other hand, need a gentler hand to avoid stripping the very finish you’re trying to protect.
Spot Testing Your Solvent
If you plan to use alcohol or acetone, test it first in a spot that’s out of sight. The underside, an inner edge, or a hidden corner all work fine.
This quick check confirms the solvent won’t dull, cloud, or lift the finish. It takes only seconds and may save you from an unpleasant surprise on a visible surface.
Clearing Dust and Loose Debris
Give the area a quick wipe before you begin scraping. Dust and grit, dragged across metal under a scraper, can leave fine scratches you’d rather avoid.
You’re not deep cleaning here. You’re just clearing loose particles so they don’t get ground into the surface while you work.
How to Remove Glue Gun Glue From Metal: Step-by-Step Guide
Here’s the core process, built around the heat-and-peel method with solvent cleanup to finish. The thing to remember throughout is simple: softening the glue first is what prevents scratches. Patience beats force at every stage.
Step 1: Let the Glue Fully Harden
This sounds backward, but resist the urge to attack glue while it’s still warm and tacky. Fresh glue smears and strings, spreading the mess rather than removing it.
Wait until the glue has cooled completely and turned solid. Hardened glue lifts away as a single piece, which is far cleaner than wrestling with a gummy blob.
Step 2: Warm the Glue With a Hair Dryer
Once the glue is solid, aim a hair dryer at it on a low to medium setting. Hold it a few inches away and give it a minute or two.
You’re looking for the glue to soften at its edges, not to liquefy. As it warms, the mechanical grip eases, and the blob becomes pliable enough to lift.
Step 3: Lift an Edge With a Plastic Scraper
While the glue is still warm, slide a plastic scraper or an old card under one softened corner. Work gently, angling the scraper to get beneath the glue rather than digging at the metal.
The goal is to catch an edge and start the separation. A plastic tool flexes and lifts without the gouging risk that a metal blade brings.
Step 4: Peel the Glue Away Slowly
With an edge lifted, pull the glue up gradually. Go slowly and let it release rather than yanking, which can leave bits behind.
If a section resists, don’t force it. Reheat that spot with the dryer for a few seconds, then continue peeling. Much of the time, the whole blob comes away in one satisfying piece.
Step 5: Try the Cold Method on Stubborn Spots
Some patches refuse to soften neatly, and that’s where cold earns its place. Press an ice cube in a bag against the stubborn glue, or chill the whole item if it fits in the freezer.
As the glue hardens and turns brittle, it often cracks free with light pressure from your scraper or fingernail. Heat and cold together cover nearly every case.
Step 6: Dissolve Leftover Residue With Alcohol
Peeling usually leaves a faint sticky film behind. Dampen a cloth with rubbing alcohol and rub the residue until it loosens and lifts.
Alcohol cuts through the tackiness without much risk to most finishes. Work in small circles and give it a moment to do its job rather than scrubbing hard right away.
Step 7: Use Acetone for Tough Remnants
If alcohol doesn’t fully clear the film, acetone is the stronger follow-up. Apply a little to a cloth and wipe the remaining residue away.
Reserve this step for bare metal you’ve already spot tested, since acetone can strip paint and clear coats. On a safe surface, though, it tends to dissolve stubborn remnants quickly.
Step 8: Wash and Dry the Surface
Finish by wiping the area with warm, soapy water to remove any lingering solvent and loosened residue. Then rinse and dry it thoroughly.
This last step clears away the chemicals and leaves the metal clean. Drying fully also prevents water spots, especially on stainless steel.
Removing Glue From Delicate or Painted Metal
Not every metal surface can take the full treatment. When the finish is painted, coated, or decorative, a few adjustments protect it while still getting the glue off.
Using Heat Without Damaging Paint
Heat is still useful here, but keep the dryer on its lowest setting and keep it moving. Holding hot air in one spot too long can blister or bubble paint.
A constant, sweeping motion warms the glue gently without overheating the coating beneath. Patience matters even more on painted surfaces than on bare metal.
Choosing Gentle Solvents
Skip the acetone on these finishes. It dissolves glue effectively, but it can just as easily strip paint and clear coats, leaving a worse mess than you started with.
Favor rubbing alcohol or even a little cooking oil instead. Both loosen residue while treating the finish kindly, which is the priority when the coating is part of what you’re protecting.
Working in Small Sections
On decorative or finished pieces, treat one small area at a time rather than rushing the whole surface. This keeps you in control and limits any accidental damage.
Small sections also let you check your progress as you go. If something starts to look off, you’ll catch it early rather than after the whole piece is affected.
Alternative Methods That Work
The heat-and-peel approach suits most situations, but it isn’t the only route. Depending on what you have on hand, one of these may serve you better.
The Cooking Oil Soak
A common kitchen oil can break a glue bond surprisingly well. Vegetable oil or coconut oil, worked around the edges of the glue, seeps underneath and loosens its grip over a few minutes.
It’s gentle, cheap, and safe on most finishes, which makes it a good first try on painted metal. Just wash the oil off afterward so the surface isn’t left greasy.
The Vinegar Method
Warm vinegar offers another mild option. Dampen a cloth with it and hold it against the glue, or wipe lingering film to help break it down.
Vinegar tends to work best on thin residue rather than thick blobs. It’s worth keeping in mind when you’d rather avoid solvents altogether.
Using a Commercial Adhesive Remover
When household methods fall short, a store-bought adhesive remover can handle the job. These products are formulated to dissolve glue quickly and predictably.
If you go this route, check that the label confirms it’s safe for metal, and follow the directions closely. As always, a spot test first is the smart move, particularly on any coated surface.
Common Mistakes to Avoid
A few avoidable errors turn an easy cleanup into a damaged surface. Steering clear of them keeps your metal looking as good as it did before the glue landed.
Scraping With Metal Tools
Reaching for a knife or razor blade feels efficient, and it’s the costliest instinct here. Metal tools scratch and gouge the surface, often leaving marks worse than the glue itself.
Stick with a plastic scraper or an old card. They lift glue effectively without that permanent damage, which is well worth the slight trade in speed.
Using Too Much Heat at Once
More heat seems like it should work faster, but it backfires. High, concentrated heat can warp thin metal and blister paint before the glue has a chance to soften evenly.
Keep the temperature moderate and the heat moving. Gentle warmth applied patiently does the job without the collateral damage.
Skipping the Spot Test
It’s easy to assume a solvent will be fine and skip straight to wiping. That assumption can dull, cloud, or strip a finish in seconds.
A quick test in a hidden spot removes the guesswork. The few seconds it costs are nothing next to the regret of a ruined surface.
How to Prevent Glue Messes on Metal
Cleaning up glue is satisfying, but avoiding the mess in the first place is easier still. A few habits keep future projects far tidier.
Using a Release Surface
A silicone mat or a sheet of parchment paper makes a fantastic work surface. Hot glue doesn’t bond well to either, so stray drips peel right off instead of sticking where you don’t want them.
Working over a release surface protects your table and your project alike. It’s a small setup step that saves real cleanup time.
Applying Glue Precisely
Much of the mess comes from overusing the glue gun. Squeezing the trigger gently and applying only what you need cuts down on drips, strings, and excess.
A little control goes a long way. Less glue on the surface means less to clean up later, and neater results in the meantime.
Cleaning Spills Right Away
If glue lands somewhere, it shouldn’t and is still warm, you sometimes have a brief window to address it. That said, the cleanest approach is usually to let it cool and peel it as a solid piece rather than smearing it while soft.
Either way, dealing with a fresh, small spot is far easier than tackling a hardened, spread-out mess weeks later. Catch it while it’s manageable.
Frequently Asked Questions
A few questions tend to come up again and again. Here are short, honest answers.
Does Hot Glue Damage Metal?
Generally, no. Because hot glue grips mechanically rather than chemically, it rarely harms the metal underneath and usually peels away clean.
Any risk of damage tends to come from removal, not the glue itself. Using gentle heat and a plastic scraper keeps the surface intact.
Will Acetone Hurt My Metal Surface?
On bare metal, acetone is typically safe and effective at dissolving stubborn residue. The concern is finishes rather than the metal.
Acetone can strip paint, clear coats, and decorative finishes quickly. So spot test first, and avoid it entirely on anything coated or painted.
Can I Reuse Metal After Removing Glue?
Yes. Once you’ve peeled the glue, cleared the residue, and washed and dried the surface, the metal is ready for reuse or regluing.
A properly cleaned surface bonds well the next time around, too. Just make sure no oily or sticky film remains before you start again.
Conclusion
For all the stubbornness those hardened blobs seem to promise, learning how to remove glue gun glue from metal really comes down to a few easy moves with supplies already at home. Understand why hot glue bonds, gather your heat source, a cold option, and a gentle solvent, soften the glue before peeling, lift any residue with alcohol or acetone, and take extra care with delicate finishes.
The key insight is that softening the adhesive first prevents scratches and saves time. Fight the glue while it’s cold and hard, or warm it until it lets go, and the metal beneath stays unharmed.
So try the heat-and-peel method on your next sticky spot, and keep a release mat handy for future projects so the mess never gets a foothold. With these simple habits, clean, glue-free metal becomes the easy norm rather than a frustrating chore.

About
Stuart Rich is a distinguished figure in the world of metalworking and fabrication, with a decade of expertise creating innovative and sustainable metal projects. His professional focus lies in merging traditional blacksmithing and machining with modern manufacturing techniques, fostering designs that are both practical and durable. As the author of Metalenify, Stuart Rich delves into the art and science of metallurgy and DIY metal creation, inspiring artisans, hobbyists, and industry professionals alike.
Education
RMIT University
(Melbourne, Australia)
Associate Degree in Engineering Technology (Mechanical / Manufacturing)
Focus on metallurgical properties, industry-driven projects, and practical metal craftsmanship. Gained hands-on experience with traditional machining and digital manufacturing tools, such as CAD, CNC software, and precision welding equipment.
Nottingham Trent University
(United Kingdom)
Bachelor’s in Product Design and Materials Engineering (Honors)
Specialized in product design with a heavy focus on blending creativity with metal production and fabrication techniques. Participated in real-world industry projects, collaborating with architectural and hardware manufacturing companies to optimize material efficiency.
Publications and Impact
In Metalenify, Stuart Rich shares his insights on structural metal design processes, material grades, and strategies for efficient shop production. His writing bridges the gap between raw artisan knowledge and modern industrial needs, making it a must-read for both budding DIY metalworkers and seasoned fabrication professionals.





