

Start by cleaning both your hands and the blocks to strip away oils and debris. Pick the smallest number of blocks that add up to your target dimension. Slide and wring them into a single solid stack, then use that stack to calibrate or check your precision instruments.
Precision measurement holds modern manufacturing together. Every micrometer and caliper leans on some fundamental standard, the thing that decides whether components actually fit when they reach final assembly. Take away a dependable calibration baseline, and even an expensive machining center will start spitting out parts that flunk inspection.
That baseline, in most machine shops, comes down to gauge blocks. They look unremarkable—small, highly polished blocks of metal or ceramic—but each one carries an exact length standard that operators trust to verify their measuring tools. The trick lies in handling and combining them correctly. Get the technique right, and your measurements stay honest while production keeps moving. In this guide on how to use gauge blocks, we’ll take a closer look at this essential tool in machining.
What Are Gauge Blocks and How Do They Work?
Gauge blocks are precision-ground, lapped rectangular blocks that act as reference standards for length. The Swedish machinist Carl Edvard Johansson came up with them, and the manufacturing approach hasn’t strayed far from his original idea: machine the blocks to tolerances so tight they almost defy belief.
Here’s the curious part. When two blocks are prepared properly, they cling to each other through a phenomenon called “wringing.” No glue, no clamps—just two flawlessly flat surfaces grabbing hold of one another. That property is what lets a machinist stack several blocks together to reach almost any length they happen to need.
What Are the Different Types of Gauge Blocks?
Three materials dominate the market: steel, tungsten carbide, and ceramic.
Steel blocks tend to be the default choice. They cost less, and their thermal expansion behavior lines up well with most industrial workpieces, which matters more than people sometimes assume. Tungsten carbide resists wear far better, so it earns its keep in high-volume inspection settings where blocks get handled constantly. Ceramic sits in its own category—it shrugs off corrosion entirely and won’t burr when scratched, a trait that can stretch its working life considerably in rough shop conditions.
Which one suits you depends largely on how hard you plan to run them. A shop checking parts all day may find that tungsten carbide or ceramic pays for itself over time, while a smaller operation rarely needs to look past steel.
7 Simple Step-By-Step Guidelines on How to Use Gauge Blocks
Step 1: Clean Your Hands and the Work Environment
Wash and dry your hands before touching anything. Skin oils, dirt, a bit of moisture—any of these can interfere with wringing and slip dimensional error into your stack. A microscopic film is all it takes. Plenty of machinists go a step further and wear lint-free gloves to keep their hands out of the equation entirely.
The room deserves the same attention. Temperature swings make materials expand and contract, and that movement works directly against the accuracy you’re chasing. Wipe your inspection table with a suitable solvent, then lay down a clean lint-free cloth or a dedicated rubber mat—cheap insurance for the moment a block slips out of your fingers.
Step 2: Calculate the Required Block Combination
Now figure out which blocks add up to your target. Aim for the fewest blocks you can manage, since every block you add brings its own tolerance error along for the ride. The method is simpler than it sounds: knock off the rightmost decimal place first by picking a block that ends in that digit.
Say you need 1.436 inches. Grab the 0.106-inch block, which leaves 1.330. Then the 0.130-inch block, leaving an even 1.200. The 1.200-inch block finishes the stack. Work backward through the decimals like this and you’ll land on an efficient combination quickly, whether your set runs metric or imperial.
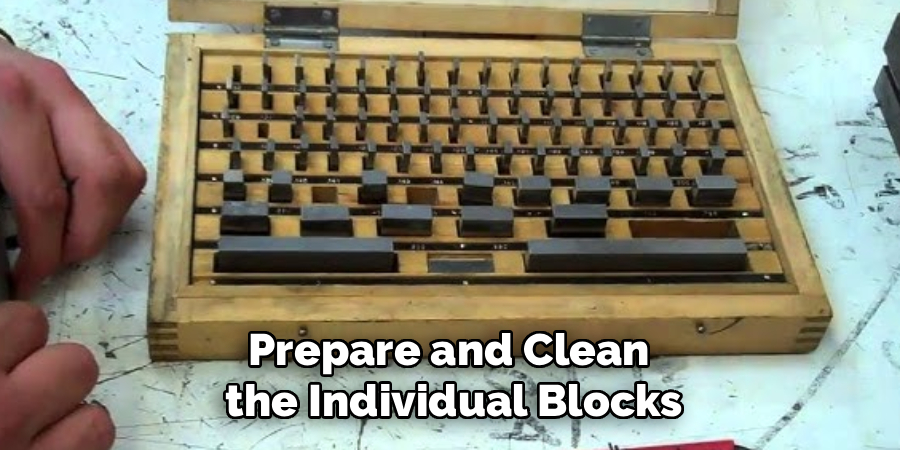
Step 3: Prepare and Clean the Individual Blocks

Pull the selected blocks from their case and wipe away the anti-corrosion oil they picked up in storage. A soft, lint-free microfiber cloth dampened with mineral spirits or a dedicated gauge block cleaner does the job. Work each measuring face gently—but don’t be timid—until no residue clings to the polished surface.
Follow that solvent pass with a dry wipe using a clean section of cloth. Then hold each block under a bright light and look closely for stray dust, smudges, or scratches. Spot a burr or a raised edge? Take it down with a conditioning stone before you go any further. Trying to wring a block with a burr is a waste of time.
Step 4: Apply a Microscopic Layer of Wringing Fluid
Dry blocks can wring together on their own, but a trace of wringing fluid protects the surfaces and tends to improve the bond. Touch a minute drop to a clean wiping pad or your gloved fingertip, then lightly brush the measuring face so an almost imperceptible film transfers across.
Wipe the face again right away with a dry cloth, lifting off nearly everything you just applied. What you want left behind is a layer thin enough to be invisible to the naked eye. Leave too much, and the oil behaves like a hydraulic cushion between the blocks—it blocks a real bond and pads out your stack length with phantom microns.
Step 5: Wring the Gauge Blocks Together

Hold both prepped blocks. Set the measuring face of the smaller one across the face of the larger one at a right angle, so they form a cross. Press gently and evenly to force out the trapped air between those ultra-flat faces.
Keep that light pressure on as you rotate the top block in a slow circle, bringing it parallel with the block beneath. Somewhere in that rotation you’ll feel it—a distinct grab, a sudden resistance where there was none. Slide the top block back and forth a touch to confirm the seal has taken, and the two are now effectively one piece.
Step 6: Verify the Accuracy of the Stack
With every block wrung into place, test the assembly before you trust it. Lift the stack by the top block; a stack that was wrung correctly carries its own weight without coming apart. If it separates, there’s no shortcut—pull the blocks, reclean the faces, and start the wringing over.
Once the bond holds, set the stack on a heat-sink plate and give it a few minutes. Your hands transferred body heat to the metal or ceramic while you worked, and that heat caused slight expansion. Letting the stack settle to the standard 68 degrees Fahrenheit (20 degrees Celsius) keeps your calibration standard true to the length you calculated.
Step 7: Calibrate Your Measurement Instruments

Your verified, temperature-stable stack is ready to serve as the reference. Bring the measuring anvils of your micrometer, caliper, or dial indicator against the outer faces of the stack, keeping the tool square to the blocks. Apply the standard measuring force through the ratchet or friction thimble and read the result.
Now compare what the instrument shows against the known length of the stack. A discrepancy means it’s time to adjust—follow the manufacturer’s instructions to reset the zero point or calibration setting. Measure the stack a second time afterward to confirm the tool reads accurately and repeats that reading. That repeatability is the whole point.
Following these steps on how to use gauge blocks will ensure accurate measurements and proper calibration of the instrument.
What Are the Common Mistakes to Avoid?
A few errors crop up again and again. Leaving blocks wrung together for long stretches invites cold welding, which permanently scars the precise surfaces. Dropping a block on a hard floor chips its edges and wrecks the flatness you depend on. Skipping the acclimation period after handling introduces a thermal expansion error that’s easy to overlook. Overdoing the wringing fluid pads the stack with length that isn’t really there. And working with blocks that already show rust or burrs corrupts the accuracy of everything built on top of them.
How Should You Maintain and Store Gauge Blocks?
Careful maintenance can keep a set serviceable for decades. The moment you finish a calibration task, slide the wrung blocks apart—leaving them joined risks permanent adhesion. Clean each one with mineral spirits to lift off fingerprints, leftover wringing fluid, and shop dust.
After the blocks are clean and fully dry, coat them with a specialized anti-corrosion oil or petroleum jelly to keep atmospheric moisture from finding the metal. Return them to their original wooden or plastic case, settling each block into its assigned slot. Then store the case somewhere temperature-controlled and low in humidity, away from direct sun and the vibration of heavy machinery.
How Can You Troubleshoot Wringing Issues?
When blocks refuse to wring securely, your first move is to inspect the measuring faces under a bright light for microscopic burrs or raised scratches. A conditioning stone, drawn gently across the surface, can lift those imperfections without changing the block’s dimension.
Still no bond? You may have left too much oil behind. Reclean with solvent and wipe the faces completely bare with a fresh, dry cloth. Humidity plays a role too—a damp inspection room can leave condensation on the surfaces that quietly defeats the wringing action. Hold your workspace to a steady climate, give the blocks time to reach thermal equilibrium, and try again.
Frequently Asked Questions About Gauge Blocks
Q1: What Is the Ideal Temperature for Using Gauge Blocks?
The international standard reference temperature for precision dimensional measurement is 68 degrees Fahrenheit (20 degrees Celsius). Store and use your gauge blocks in a climate-controlled room held at that temperature, and let the blocks acclimate before measuring. Doing so keeps thermal expansion from creeping in and helps the blocks hold their certified dimensions through the calibration.
Q2: How Often Should You Calibrate Your Gauge Block Set?
Most quality control standards call for sending gauge blocks to an accredited laboratory for professional calibration at least once a year. A shop that handles them daily, or runs in a harsh environment, may want to shorten that interval to every six months. Regular calibration documents any wear or dimensional drift and preserves the traceability of your internal measurements.
Q3: Can You Mix Gauge Blocks from Different Manufacturers?
You can, provided the blocks share the same industrial standard and grade. The caution comes with materials: combining steel and ceramic, for instance, brings together different coefficients of thermal expansion, which can complicate precise work. When accuracy really counts, most professionals lean toward a single matched set.
Next Steps for Mastering Precision Measurement
Handled correctly, gauge blocks turn an ordinary machine shop into one capable of world-class precision. Strict cleanliness habits and a well-practiced wringing technique give you a foundation for dimensional accuracy that simply doesn’t budge. Fold these seven guidelines into your daily quality control routine and watch measurement errors start to disappear.
A practical next step costs nothing: pull up your facility’s calibration schedule and check that your primary reference sets are current and properly certified by an accredited laboratory. Thanks for reading this guide on how to use gauge blocks.

About
Stuart Rich is a distinguished figure in the world of metalworking and fabrication, with a decade of expertise creating innovative and sustainable metal projects. His professional focus lies in merging traditional blacksmithing and machining with modern manufacturing techniques, fostering designs that are both practical and durable. As the author of Metalenify, Stuart Rich delves into the art and science of metallurgy and DIY metal creation, inspiring artisans, hobbyists, and industry professionals alike.
Education
RMIT University
(Melbourne, Australia)
Associate Degree in Engineering Technology (Mechanical / Manufacturing)
Focus on metallurgical properties, industry-driven projects, and practical metal craftsmanship. Gained hands-on experience with traditional machining and digital manufacturing tools, such as CAD, CNC software, and precision welding equipment.
Nottingham Trent University
(United Kingdom)
Bachelor’s in Product Design and Materials Engineering (Honors)
Specialized in product design with a heavy focus on blending creativity with metal production and fabrication techniques. Participated in real-world industry projects, collaborating with architectural and hardware manufacturing companies to optimize material efficiency.
Publications and Impact
In Metalenify, Stuart Rich shares his insights on structural metal design processes, material grades, and strategies for efficient shop production. His writing bridges the gap between raw artisan knowledge and modern industrial needs, making it a must-read for both budding DIY metalworkers and seasoned fabrication professionals.





