Welding mild steel comes down to four things — clean metal, the right process, dialed-in machine settings, and a steady hand. Because mild steel has a low carbon content (typically 0.05% to 0.25%), it responds well to most welding methods, which is part of why it’s often the first material beginners work with.
Mild steel shows up everywhere — fabrication shops, construction sites, home garages. Its affordability and ductility make it a practical choice for everything from trailer repairs to custom furniture. That low carbon content means it’s forgiving compared to, say, high-strength alloy steels, and it doesn’t demand the fussy preheat procedures that thicker, harder materials often require.
Still, “forgiving” doesn’t mean “foolproof.” Poor preparation, wrong settings, or skipped safety steps can turn a straightforward project into a mess of porosity and warped metal. This guide on how to weld mild steel walks through every stage — tools, prep, execution, and inspection — so you can approach your next weld with a clear plan.
What Tools and Materials Do You Need to Weld Mild Steel?
Before diving into the welding process, it’s important to ensure you have all the necessary tools and materials ready. Here are some of the key items you’ll need for welding mild steel:
Tools:
- Welding Machine
- Welding Helmet
- Gloves
- Clamp
- Wire Brush
- Chipping Hammer
Materials:
- Mild Steel (of course!)
- Welding Rods or Wire
- Gas or Flux for Shielding
7 Simple Step-By-Step Guidelines on How to Weld Mild Steel
Step 1: Clean and Prepare the Metal Surface
This step arguably matters more than anything else in the process. Mild steel from a supplier is often coated in mill scale — that dark, flaky residue left over from hot rolling. Older pieces may carry rust, oil, or paint. Weld over any of that contamination and it gets trapped in the molten pool, which leads to porosity, weak fusion, and spatter that’s genuinely difficult to clean up.
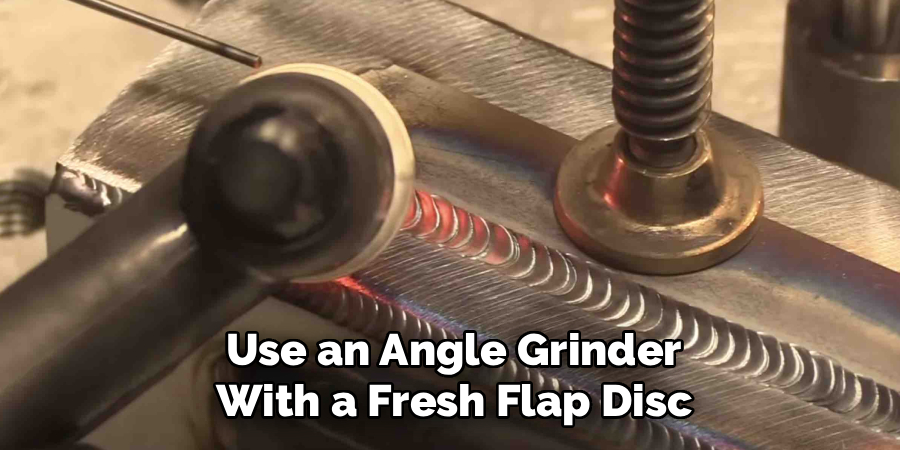
Use an angle grinder with a fresh flap disc to strip the area down to bright, bare steel. Follow that with an acetone wipe to pull any residual oil or fingerprints off the surface. It takes maybe ten extra minutes. The difference in weld quality is noticeable.
Step 2: Choose the Correct Welding Process and Machine
Mild steel tolerates most standard welding processes, so the right choice depends on your project rather than the material itself.
MIG welding tends to be the go-to for both beginners and production environments. The continuous wire feed handles the filler metal automatically, which lets you focus on travel speed and gun angle — two things that take time to develop. For clean indoor work on material between 18 gauge and 3/8 inch, MIG is hard to beat.
TIG welding makes sense when appearance or precision takes priority — custom exhaust work, thin sheet metal, applications where you want a refined, consistent bead. It’s slower and demands more coordination, but the control it offers is unmatched.
Stick welding (SMAW) holds its own in outdoor conditions or on thicker stock that still has some surface rust. Unlike MIG, it doesn’t rely on an external shielding gas that wind can disrupt. If you’re doing field repairs, Stick may simply be the more practical call.
Step 3: Set Your Machine Parameters Accurately
Getting the voltage and wire feed speed right — or amperage, if you’re running TIG or Stick — is where a lot of beginners lose time. Every machine behaves a little differently, and the settings that work on one unit may not transfer directly to another.
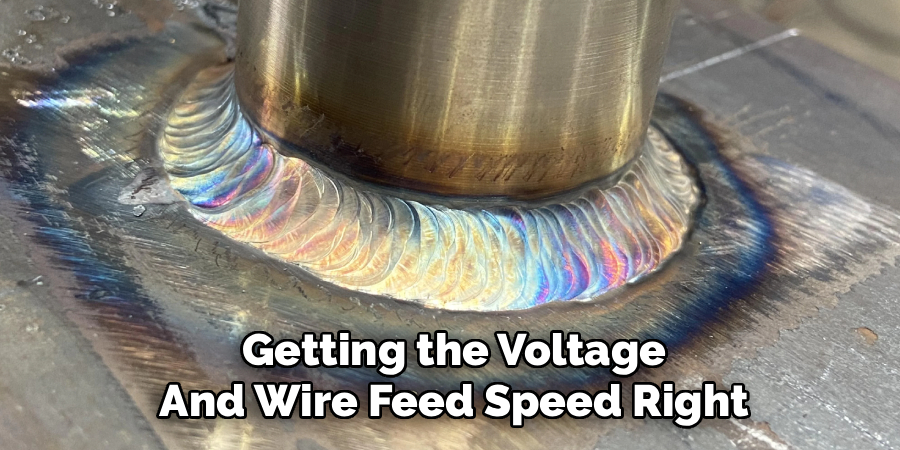
Most MIG welders include a reference chart inside the wire spool door that lists baseline settings by metal thickness and wire diameter. Use it as a starting point, not a guarantee.
If your wire speed is too high relative to voltage, the wire stubs into the base metal and piles up in a cold, convex bead that barely bonds with the surface. Too much heat on thin stock, and you’re burning through. Run a few practice beads on a scrap of the same thickness before touching your actual workpiece. It’s the kind of step that feels unnecessary until you skip it and regret it.
Step 4: Secure and Clamp Your Workpieces
Heat causes metal to move. That’s just physics. As the arc deposits energy into the joint, the steel expands and pulls in directions you didn’t plan for. Two pieces that were flush before you started can end up noticeably misaligned by the time you’re done — unless you’ve clamped them down properly.
C-clamps and locking pliers are your first line of defense. Magnetic welding squares are worth having too, particularly when you’re holding pieces at precise angles. Check that there’s no unintended gap between the pieces before you start — most lap and butt joints don’t benefit from a gap unless the design specifically calls for a root opening to aid penetration.
Spending five minutes on clamping can save you an hour of grinding and re-cutting later.
Step 5: Place Tack Welds to Hold the Structure
Tack welds are short — typically one to two seconds of arc — and their only job is to hold the pieces in position while you work. Think of them as temporary fasteners you’ll eventually bury under your final bead.
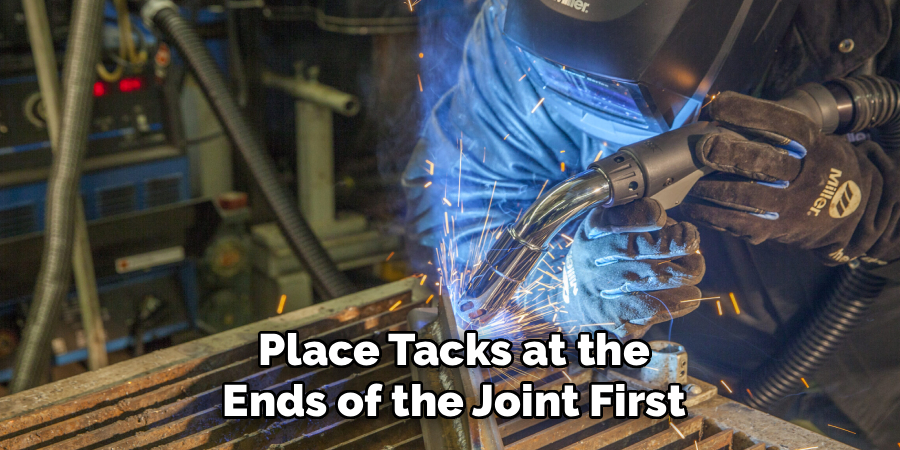
Place tacks at the ends of the joint first, then space additional tacks every few inches along the seam depending on the total length. If you’re building a frame, measure the diagonals after your first two tacks. The metal is still easy to adjust at this stage. Once you’ve run the full bead, fixing a skewed corner means cutting the joint apart and starting over.
Step 6: Execute the Final Weld Bead
With your settings confirmed and your pieces tacked solid, you’re ready to lay down the main bead. Position the gun at roughly 10 to 15 degrees from vertical and move along the joint at a steady, controlled pace. For MIG on mild steel, small weaving motions — like tracing a cursive “e” or a gentle zig-zag — can help the puddle tie into both sides of the joint rather than sitting in the center.
Watch the leading edge of the molten puddle, not the arc. The puddle tells you what’s actually happening: whether the weld is penetrating, whether it’s flowing cleanly, whether you need to slow down or speed up. A bead that’s moving too fast ends up narrow and underbuilt. Moving too slowly deposits excess heat and filler, which can cause distortion or burn-through on thinner material.
Consistency of travel speed matters more than perfect technique. A smooth, even bead with decent penetration beats a textbook-looking weld that’s missing fusion at the root.
Step 7: Inspect and Clean the Finished Weld
Let the weld cool on its own. Quenching it with water to speed things up may seem harmless, but the rapid temperature change can introduce stress and embrittlement into the heat-affected zone — particularly in heavier sections. Air cooling is the safe default.
Once the metal is cool enough to handle, inspect the bead for visible defects: surface porosity (small pits or holes), undercutting along the toes, or areas that appear to lack fusion. If you used flux-cored wire or a Stick process, chip the slag away with a chipping hammer and follow up with a wire brush. MIG welds are cleaner, but a quick brush pass removes spatter and gives you a clear view of the joint.
A weld that looks good on the surface isn’t automatically a sound weld, but visible defects are almost always worth addressing before the piece goes into service. Following these steps on how to weld mild steel will help ensure strong and clean welds that are safe for use.
What Are the Common Mistakes to Avoid When Welding Mild Steel?
A few problems come up consistently, especially for people who are newer to the process.
Skipping surface prep is the most common — and the most consequential. Contamination that gets trapped in the puddle doesn’t announce itself until the weld fails. Traveling too fast across the joint is another frequent issue; the bead looks deposited, but penetration into the base metal may be shallow.
Incorrect shielding gas flow causes its own set of problems: too little and porosity appears, too much and turbulence pulls atmospheric contamination into the arc. Finally, underestimating the importance of PPE tends to be a beginner pattern that corrects itself after the first arc flash.
Do You Need To Use Professionals for Welding Mild Steel?
It depends almost entirely on what the weld will be asked to do. A garden bed frame or a workshop shelf? A competent hobbyist can handle that with reasonable preparation and practice.
Structural steel, vehicle chassis work, roll cages, or anything that must support loads under legal or safety standards — that’s a different situation. Certified welders bring inspection equipment, formal procedure qualification, and liability coverage to the table. The stakes of a joint failure in those contexts are high enough that the cost of professional work is rarely the deciding factor.
How Much Will It Cost to Weld Mild Steel?
Starting from scratch with a reliable entry-level MIG welder, a gas cylinder, and the necessary safety gear typically runs between $400 and $800. Mild steel itself is relatively inexpensive — noticeably cheaper per pound than aluminum or stainless.
If you hire a professional mobile welder, expect to pay somewhere in the range of $75 to $150 per hour, with consumables and materials billed separately. Rates vary by region and job complexity.
Frequently Asked Questions About Welding Mild Steel
Q1: What Is The Best Shielding Gas For Mig Welding Mild Steel?
The industry standard is C25 — 75% Argon, 25% Carbon Dioxide. This blend produces a stable arc with good penetration and less spatter than straight CO2. For most mild steel applications, it also tends to give a cleaner, flatter bead profile. Some shops run 100% CO2 to cut costs, and it works, but the arc is noticeably harsher and spatter increases.
Q2: Do I Have To Preheat Mild Steel Before Welding?
For most thicknesses under 3/4 inch, preheat isn’t necessary. Mild steel’s low carbon equivalent means it doesn’t harden in the heat-affected zone the way higher-carbon steels can. That said, if you’re working in cold conditions — below freezing, particularly — a light preheat helps drive out surface moisture and slows the cooling rate enough to reduce the risk of cracking in thicker sections.
Q3: Can I Weld Over Rust On Mild Steel?
Certain processes, like Stick welding with a 6010 or 6011 rod or flux-cored arc welding, can push through light surface rust. But doing so for any structural joint is worth thinking twice about. Rust carries oxygen and moisture, both of which can produce porosity in the weld. The safer approach — and the one that typically produces a cleaner result — is to grind back to bare metal before you start.
Final Thoughts and Next Steps
Welding mild steel well comes down to preparation, patience, and paying attention to the puddle. The material itself is accommodating — it’s the process that requires discipline.
If you’re just starting out, the most useful thing you can do is get some clean mild steel scrap from a local metal yard and run practice beads. Don’t pressure yourself to build something. Focus on how the puddle moves, how the bead looks at different travel speeds, and how your machine responds to small setting changes. That hands-on repetition builds the kind of feel that no guide on how to weld mild steel can fully substitute for.
About
Stuart Rich is a distinguished figure in the world of metalworking and fabrication, with a decade of expertise creating innovative and sustainable metal projects. His professional focus lies in merging traditional blacksmithing and machining with modern manufacturing techniques, fostering designs that are both practical and durable. As the author of Metalenify, Stuart Rich delves into the art and science of metallurgy and DIY metal creation, inspiring artisans, hobbyists, and industry professionals alike.
Education
RMIT University
(Melbourne, Australia)
Associate Degree in Engineering Technology (Mechanical / Manufacturing)
Focus on metallurgical properties, industry-driven projects, and practical metal craftsmanship. Gained hands-on experience with traditional machining and digital manufacturing tools, such as CAD, CNC software, and precision welding equipment.
Nottingham Trent University
(United Kingdom)
Bachelor’s in Product Design and Materials Engineering (Honors)
Specialized in product design with a heavy focus on blending creativity with metal production and fabrication techniques. Participated in real-world industry projects, collaborating with architectural and hardware manufacturing companies to optimize material efficiency.
Publications and Impact
In Metalenify, Stuart Rich shares his insights on structural metal design processes, material grades, and strategies for efficient shop production. His writing bridges the gap between raw artisan knowledge and modern industrial needs, making it a must-read for both budding DIY metalworkers and seasoned fabrication professionals.


