
Stainless steel looks sleek and modern, but daily use leaves behind smudges, scratches, and dull spots that hide its natural shine. Whether you are restoring a kitchen sink, a set of appliances, or a prized motorcycle part, learning how to polishing stainless steel turns a tired surface into a mirror-like finish you can feel proud of. The good news is that this skill is easier than it looks, and you do not need a workshop full of fancy gear to get great results.
This guide walks you through the entire process in clear, friendly steps anyone can follow, no matter your experience level. We will cover the supplies you need, the right way to clean and buff each surface, and the small tricks that separate an okay job from a flawless one. By the time you finish reading, you will have the confidence to tackle your own project and bring back that bright, professional gleam. Grab your supplies, set aside a little time, and let us get that metal shining like new.
Why Polishing Stainless Steel Matters
A polished surface does more than look good, though that shine is certainly satisfying. Smooth, clean metal resists fingerprints, water spots, and grime, which means less scrubbing for you down the road. It also helps protect against corrosion, since a sealed, even finish gives rust and stains fewer places to take hold.
There is a practical payoff too. Well-maintained steel lasts longer, holds its value, and keeps appliances and fixtures performing at their best. For anyone selling a home, refurbishing equipment, or simply taking pride in their space, a gleaming surface signals quality and care. Best of all, regular upkeep prevents deep damage, so a little effort now saves you from costly repairs or replacements later. The result is a surface that stays beautiful and functional for years.
Step-by-Step Guide To How to Polishing Stainless Steel
Step 1: Gather Your Supplies
Before you start, collect everything you need so the work flows smoothly. You will want microfiber cloths, a mild dish soap, white vinegar, a quality metal polish, and a soft applicator pad. For deeper scratches, keep wet-and-dry sandpaper in a few grits on hand, along with rubber gloves and safety glasses for protection.
Having the right tools nearby saves you from stopping mid-project to hunt for supplies. Choose a polish made specifically for steel, since household cleaners can leave streaks or dull the finish. A little preparation here makes a big difference, setting you up for a clean, even result and a far less frustrating experience overall.
Step 2: Clean The Surface Thoroughly
Start with a spotless base, because polishing over dirt only grinds grime into the metal. Mix warm water with a few drops of mild dish soap, then wipe the surface down with a soft microfiber cloth. Work gently and lift away grease, dust, and any sticky residue you find.
For stubborn spots, a splash of white vinegar cuts through buildup without harming the steel. Once everything is clean, rinse with fresh water and dry completely, since leftover moisture can cause streaks or spots. A truly clean surface lets the polish bond evenly and reveals the true condition of the metal underneath, so never rush this important step.
Step 3: Identify The Grain Direction
Stainless steel has a grain, much like wood, and following it is the secret to a flawless finish. Look closely and you will notice fine lines running in one direction across the surface. These lines guide every move you make from here on, so take a moment to study them in good light.
Always work along the grain rather than against it or in circles, which can leave swirl marks that catch the eye. Running your cloth and polish in the same direction as these lines keeps the finish smooth and uniform. This simple habit is what makes professional results look so clean, and it costs you nothing but a little attention.
Step 4: Tackle Scratches And Imperfections
If your surface has light scratches, you can smooth them out before the final shine. Dampen fine wet-and-dry sandpaper, then sand gently along the grain using light, even pressure. Start with a finer grit and only move to coarser paper if a scratch refuses to fade, since aggressive sanding can do more harm than good.
Knowing how to polishing stainless steel the right way means being patient with this stage. Wipe the area frequently to check your progress and keep the surface wet to avoid heat damage. Once the scratch blends into the surrounding metal, you are ready to refine the look and bring back its smooth, consistent texture.
Step 5: Apply The Polish
Now comes the rewarding part where the shine begins to appear. Squeeze a small amount of metal polish onto a soft applicator pad or clean microfiber cloth. A little goes a long way, so resist the urge to overdo it, as too much product just creates extra cleanup later.
Spread the polish across the surface using steady strokes that follow the grain. Cover the area evenly and let the formula do its work, gently lifting away fine oxidation and haze. Mastering how to polishing stainless steel comes down to this balance of light pressure and consistent direction, which builds a deep, even luster without streaks or patchy spots.
Step 6: Buff To A Brilliant Shine
With the polish applied, it is time to bring out that mirror finish. Take a fresh, dry microfiber cloth and buff the surface in firm, straight strokes along the grain. As you work, you will see the haze disappear and a bright, reflective gleam take its place.
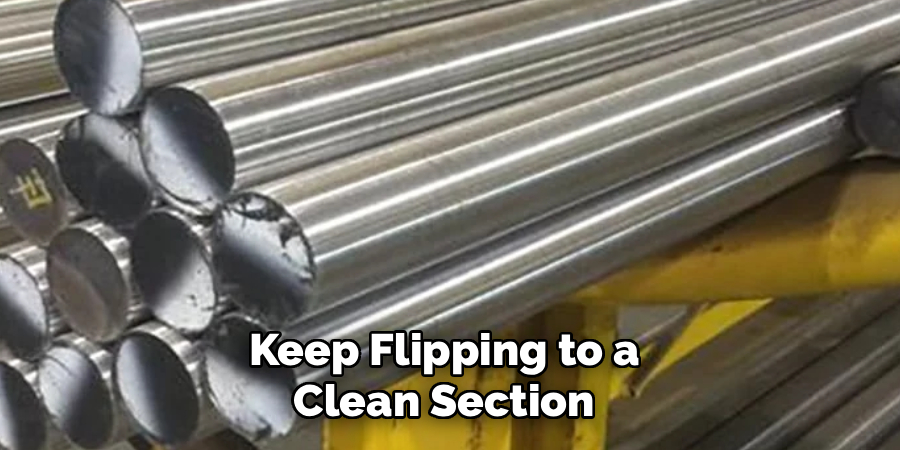
Keep flipping to a clean section of cloth as it picks up residue, since a dirty cloth can smear the surface and undo your progress. Apply steady pressure and stay patient, working one section at a time for even coverage. The more care you put into buffing, the deeper and longer-lasting the shine, rewarding your effort with a truly professional result.
Step 7: Protect And Maintain The Finish
Sealing your hard work helps the shine last far longer. Apply a thin coat of stainless steel protectant or a small dab of mineral oil to a clean cloth, then wipe it gently over the surface following the grain. This thin layer repels fingerprints, water, and dust, keeping the metal looking fresh between cleanings.
Going forward, wipe surfaces regularly with a soft cloth and avoid abrasive scrubbers that can scratch the finish. A quick monthly touch-up keeps grime from building up, so you rarely need a deep restoration again. With this simple routine, your polished steel stays bright, smooth, and beautiful with minimal ongoing effort.
Frequently Asked Questions
What Household Items Can I Use For A Quick Shine?
Several everyday items work surprisingly well for a fast touch-up. White vinegar cuts through fingerprints and water spots, while a thin layer of olive oil or mineral oil adds a streak-free gleam. Simply spray on vinegar, wipe along the grain, then buff with a few drops of oil on a microfiber cloth. It is a budget-friendly trick for keeping surfaces bright between deeper cleaning sessions.
Can I Use Sandpaper Without Damaging The Metal?
Yes, as long as you use the right approach. Always choose fine-grit wet-and-dry sandpaper, keep the surface wet, and sand gently along the grain rather than across it. Start with the finest grit that handles the scratch and apply light pressure. Working slowly prevents heat buildup and uneven spots, so you remove imperfections while keeping the metal smooth and ready for a flawless final polish.
How Often Should I Polish My Stainless Steel?
It depends on use and exposure. High-traffic items like kitchen appliances or sinks benefit from a light polish every month, while decorative pieces may only need attention a few times a year. Regular cleaning with mild soap handles daily grime, so full polishing is needed less often. Watch for dullness, fingerprints, or haze, since these signs tell you it is time for another refreshing treatment.
Why Does My Surface Look Streaky After Cleaning?
Streaks usually come from leftover moisture, cleaning product residue, or wiping in random directions. To fix this, rinse thoroughly, dry completely, and always wipe along the grain with a clean microfiber cloth. Avoid harsh chemical sprays that leave a film behind. A final buff with a dry cloth or a tiny bit of oil removes any remaining haze and restores that smooth, even shine you are after.
Is Polishing Different For Brushed Versus Mirror Finishes?
Yes, the two finishes call for slightly different care. Brushed steel has visible directional lines, so you must always work along the grain to preserve its texture. Mirror finishes are smooth and reflective, making them more prone to showing swirl marks and fingerprints. For mirror surfaces, use a dedicated polish and very soft cloths, buffing gently to avoid fine scratches that stand out on the reflective surface.
Conclusion
Bringing back the shine on your steel surfaces is a rewarding project that anyone can master with a little patience and the right approach. From gathering supplies and cleaning thoroughly to following the grain, smoothing scratches, and sealing in that brilliant finish, each step builds toward a result you can genuinely be proud of. The effort pays off in surfaces that look cleaner, last longer, and resist the wear of daily life.
Now that you understand how to polishing stainless steel from start to finish, you have everything you need to transform dull, smudged metal into a gleaming centerpiece. So pick a surface that needs some love, set aside a little time, and put these techniques into action. Your appliances, fixtures, and prized pieces will reward you with a bright, professional shine that keeps your space looking its very best.

About
Stuart Rich is a distinguished figure in the world of metalworking and fabrication, with a decade of expertise creating innovative and sustainable metal projects. His professional focus lies in merging traditional blacksmithing and machining with modern manufacturing techniques, fostering designs that are both practical and durable. As the author of Metalenify, Stuart Rich delves into the art and science of metallurgy and DIY metal creation, inspiring artisans, hobbyists, and industry professionals alike.
Education
RMIT University
(Melbourne, Australia)
Associate Degree in Engineering Technology (Mechanical / Manufacturing)
Focus on metallurgical properties, industry-driven projects, and practical metal craftsmanship. Gained hands-on experience with traditional machining and digital manufacturing tools, such as CAD, CNC software, and precision welding equipment.
Nottingham Trent University
(United Kingdom)
Bachelor’s in Product Design and Materials Engineering (Honors)
Specialized in product design with a heavy focus on blending creativity with metal production and fabrication techniques. Participated in real-world industry projects, collaborating with architectural and hardware manufacturing companies to optimize material efficiency.
Publications and Impact
In Metalenify, Stuart Rich shares his insights on structural metal design processes, material grades, and strategies for efficient shop production. His writing bridges the gap between raw artisan knowledge and modern industrial needs, making it a must-read for both budding DIY metalworkers and seasoned fabrication professionals.





